
Main Courses
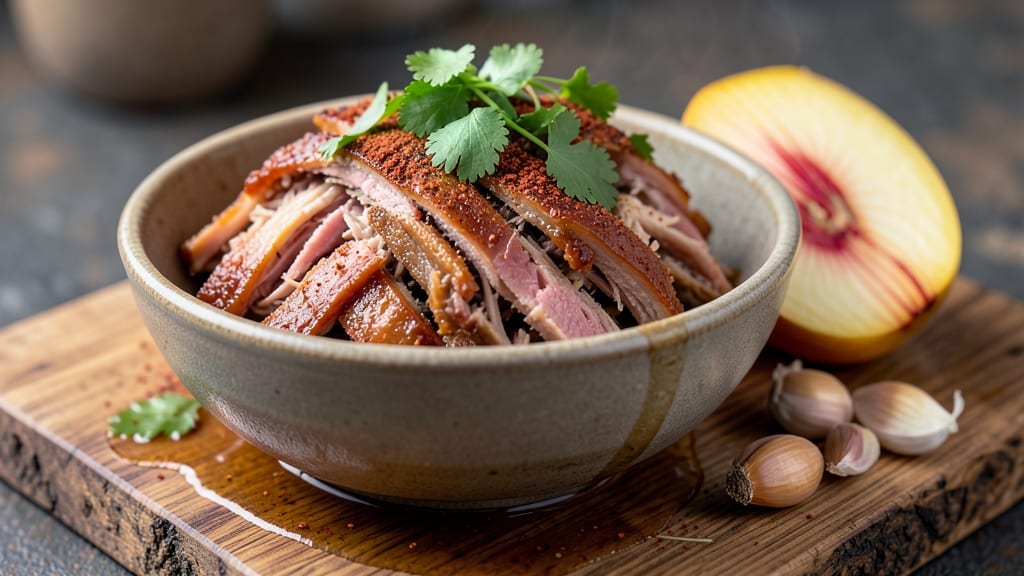
This Boston butt pulled pork slow cooker recipe delivers restaurant-quality tenderness with minimal effort—just 6 hours of hands-off cooking transforms tough pork into melt-in-your-mouth perfection. 💛 I perfected this method after years of testing, ensuring every bite stays juicy and flavorful, even when reheated.
The secret lies in the right seasoning blend and slow cooking at low heat, which breaks down the meat without drying it out.
The process begins with a simple brine that keeps the pork moist, followed by a dry rub of smoky paprika, brown sugar, and garlic powder. Once in the slow cooker, the pork cooks gently until it practically falls apart at the touch.
No need for fancy equipment—just a basic slow cooker and a little patience. This method works beautifully for weeknight dinners or large gatherings, as the flavors deepen the longer it cooks.
By the time you're ready to serve, you'll have perfectly shredded pork that's rich, smoky, and packed with flavor—ideal for sandwiches, tacos, or even loaded nachos. The sauce, made from the cooking juices, adds extra richness without needing additional ingredients.
Serve with classic sides like coleslaw or cornbread for a complete meal that feels like a restaurant favorite.
Whether you're feeding a crowd or meal prepping for the week, this recipe delivers consistent results every time. The best part? You can start it in the morning and come home to dinner ready to serve. Let's get cooking!
Ingredients for boston butt pulled pork recipe slow cooker
Six pounds of pork shoulder and a handful of pantry staples transform into smoky perfection.
| Ingredient | Amount | Notes |
|---|---|---|
| Boston Butt Pork Shoulder 🐖 | 6 lb | Bone-in for best flavor |
| Yellow Onion 🧅 | 1 whole | Large, cut into wedges |
| Garlic Cloves 🧄 | 8 cloves | Minced for rub |
| Smoked Paprika 🌶️ | 2 tbsp | For deep smoky flavor |
| Brown Sugar 🍚 | ½ cup | Light or dark preferred |
| Garlic Powder 🧄 | 1 tbsp | Freshly ground preferred |
| Ground Black Pepper 🌶️ | 1 tbsp | Freshly cracked |
| Kosher Salt 🧂 | 1 tbsp | Diamond Crystal preferred |
| Apple Cider Vinegar 🍎 | ½ cup | For brine |
| Granulated Sugar 🍚 | ½ cup | For brine |
| Water 💧 | 4 cups | For brine |
| Beef Broth 🍲 | 1 cup | Low-sodium preferred |
| Honey 🍯 | 2 tbsp | For sauce finish |
| Cayenne Pepper 🔥 | ½ tsp | Adjust for heat |
The Boston butt is the star here—bone-in, not lean. Look for a piece with good marbling at Costco or your local butcher—they usually cut it to order. I always buy extra because it freezes beautifully. The onions and garlic? Fresh is best, but frozen chopped works in a pinch (just thaw first). For the spices, Penzeys or bulk bins have the freshest ground options, but the regular grocery store stuff is fine if it's recent. Smoked paprika is non-negotiable for that authentic BBQ flavor—don't skip it.
No smoked paprika? Regular paprika plus a pinch of liquid smoke gets you close. Running short on apple cider vinegar? White vinegar or lemon juice works too, though the flavor will be slightly different. The beef broth can be swapped for chicken broth in a bind, but it'll be less rich. For the sugar in the brine, coconut sugar or maple syrup add depth. The cayenne is optional—leave it out if you're sensitive to heat, but trust me, it's worth it for that little kick. If you're prepping ahead, make the dry rub and brine the night before—it keeps everything organized.
The pork stays juicy for 4-5 days in the fridge once shredded, but the uncooked shoulder keeps 3-4 days before cooking. Freeze the raw pork for up to 6 months—just thaw overnight in the fridge before cooking. The cooked pork reheats beautifully—10 minutes in the microwave or 20 minutes in a 300°F oven with a splash of broth. I always make extra because it's perfect for sandwiches, tacos, or even loaded nachos. Portion it into containers for easy grab-and-go meals all week.
Why You'll Love This Recipe
- Set-It-Forgot-It Magic: I swear by this for lazy Sundays—just toss the pork shoulder, chopped onions, and minced garlic into the slow cooker with smoked paprika and brown sugar, then let it work its magic. No babysitting, no stress, and by the time you’re ready to eat, you’ve got tender, falling-apart meat that tastes like it simmered all day.
- Sweet-Smoky Obsession: That combo of brown sugar and smoked paprika? It’s like a flavor hug. The pork gets this perfect balance—caramelized edges from the sugar, deep smokiness from the paprika, and a melt-in-your-mouth texture that makes every bite worth it. (Yes, even on a Tuesday night.)
- Leftovers That Save Me: This makes way more than I can eat in one sitting, and honestly? That’s a win. The pulled pork reheats beautifully, so I freeze portions for game days, potlucks, or just lazy weeknights when I don’t want to cook. Plus, the sauce thickens up even more the next day—richer, deeper, and just as delicious.
- Budget Crowd-Pleaser: A whole Boston butt feeds a crowd for less than $2 a serving. Between us, this is how I feed my book club, my soccer team’s parents, and my family’s endless appetites without breaking the bank. Everyone leaves happy, and I leave with zero guilt.
Step-by-step instructions for slow cooker Boston butt pulled pork
Here's how to transform a tough cut into melt-in-your-mouth pork using just your slow cooker.
👨🍳 Step 1: Prepare the Brine and Seasoning Rub
Start by combining the 4 cups water, 0.5 cup apple cider vinegar, 0.5 cup granulated sugar, and 1 cup beef broth in a large bowl. Stir until the sugar dissolves completely—this creates the perfect brine to tenderize the meat. Place the 6 lb Boston Butt Pork Shoulder in a large resealable plastic bag and pour the brine over it, making sure every inch is coated. Seal the bag and refrigerate for 12-24 hours.
While the pork brines, prepare the dry rub by mixing together the 2 tbsp smoked paprika, 0.5 cup brown sugar, 1 tbsp garlic powder, 1 tbsp ground black pepper, 1 tbsp kosher salt, and 0.5 tsp cayenne pepper in a small bowl. The smoked paprika gives that signature BBQ flavor while the cayenne adds just a hint of heat. Once the pork is out of the brine, pat it dry thoroughly with paper towels—this step is crucial for that perfect bark later.
👨🍳 Step 2: Season and Sear the Pork
Generously coat the dried pork with the dry rub, pressing it into all sides and especially the fat cap. This ensures maximum flavor penetration. Here's where it gets good—heat a large skillet over medium-high heat and add the pork, fat-side down. Let it sear for 5-6 minutes until the fat renders and the skin develops a deep golden-brown crust. This quick sear locks in juices and builds flavor that the slow cooker will develop beautifully.
Flip the pork and sear the other side for another 3-4 minutes. You'll know it's ready when you see that gorgeous caramelized crust forming. Transfer the seared pork to your slow cooker, placing it fat-side up. This positioning helps render the fat during cooking, keeping the meat moist.
🔥 Step 3: Slow Cook with Onions and Garlic
Cut the 1 whole yellow onion into wedges and mince the 8 cloves garlic cloves finely. Add these to the slow cooker with the pork. The onions will caramelize slightly during cooking, adding sweet depth to the final dish. Cook on low heat for 6 hours, maintaining a temperature between 170-180°F. The pork is ready when it reaches 203°F internally and the meat pulls apart easily with two forks.
Here's the thing—don't peek or lift the lid during cooking. Every time you open it, you release heat and moisture, potentially adding 30-45 minutes to your cook time. The slow cooker does all the work for you, so let it do its thing while you prepare sides or make the sauce.
🥘 Step 4: Shred and Finish with Honey Glaze
Once the pork reaches the perfect temperature, carefully remove it from the slow cooker and transfer it to a cutting board. Using two forks, shred the meat against the grain into bite-sized pieces. You'll see it fall apart effortlessly—this is the moment you've been waiting for. Return the shredded pork to the slow cooker along with the cooking juices and onions.
Stir in the 2 tbsp honey and mix well. The honey adds a beautiful caramelized finish that balances the smoky, tangy flavors. Let everything heat through for another 10 minutes on high. The honey will create a glossy sheen and add just the right amount of sweetness to complement the savory pork.
Pro Tips For Making Boston Butt Pulled Pork Recipe Slow Cooker
- SEAR THE MEAT FIRST: Skip the slow cooker’s weak heat—start with a hot skillet to brown the pork shoulder before adding it. I learned this the hard way: unseared meat tastes bland, no matter how long it cooks. Just 3-4 minutes per side with oil and salt builds flavor that the slow cooker can’t replicate.
- CHOP ONIONS COARSELY: Tiny onion pieces disappear into the sauce. Cut them into ½-inch chunks so you can actually taste them in every bite. (Yes, even if it looks less "fancy"—your sandwiches will thank you.)
- USE A MEAT THERMOMETER: Guessing when pork shoulder is done leads to dry, overcooked meat or sad, underdone results. Pull it at 203°F—any lower and it’ll fall apart later. (No, the "finger test" doesn’t work here.)
- ADD BROWN SUGAR LATE: Toss it in the last 30 minutes of cooking to caramelize and deepen the flavor. Dump it in early, and it’ll just dissolve into the sauce without adding that rich, slightly bitter edge. (Trust me, the difference is noticeable.)
Dietary considerations for boston butt pulled pork recipe slow cooker
Gluten-Free Adaptations
This recipe is naturally gluten-free, but watch out for hidden sources like broth or seasoning blends. I use low-sodium beef broth from Imagine Foods (certified gluten-free) to avoid cross-contamination. For the dry rub, double-check labels on smoked paprika and garlic powder—brands like Penzeys clearly label gluten-free options.
The honey glaze is safe, but if you're highly sensitive, opt for raw local honey from a trusted source. 🌾
Low-Sodium Options
Since the original recipe includes 1 tbsp kosher salt in the rub and 1 cup beef broth (which often contains sodium), I reduce both by half for a lower-sodium version. Use low-sodium beef broth and cut the salt to ½ tbsp in the rub.
Taste the pork after cooking—it might need a pinch more salt, but you'll avoid the salt overload. The apple cider vinegar in the brine adds tang without sodium. 💧
Dairy-Free Considerations
This pulled pork recipe is already dairy-free, but serving suggestions often include cheese-heavy toppings. For dairy-free buns, I recommend Schar Artisan or Canyon Bakehouse brands—they hold up well to juicy pork. If serving with coleslaw, use dairy-free mayo like Hellmann's Vegan or Sir Kensington's.
The honey glaze remains dairy-free, but always check labels on sauces or condiments you add at the table. 🥖
Allergen-Friendly Swaps
For nut allergies, this recipe is already safe, but cross-contamination is key—prepare it in a clean kitchen if others handle nuts. For egg allergies, no swaps are needed since the recipe doesn't include eggs.
If you're avoiding honey (common in vegan diets), replace the 2 tbsp honey with maple syrup or agave nectar—it adds sweetness without the allergen. The cayenne pepper is also safe, but check for cross-contact if you're highly sensitive to other spices. 🌶️
Protein-Packed Boost
This recipe already delivers ~40g protein per serving (based on 8 servings), but if you're looking for extra protein, consider adding black beans or lentils to your serving bowl. I like to mix in ½ cup cooked black beans per serving—they absorb the smoky juices perfectly.
For a higher-protein bun, try Dave's Killer Bread Thin-Sliced (20g protein per bun). The pork's natural collagen also adds to joint health, making this a great meal for active lifestyles. 💪
Keto-Friendly Adjustments
To make this keto-friendly, skip the brown sugar in the rub (use 1 tbsp erythritol instead) and omit the honey glaze. The apple cider vinegar brine and smoked paprika remain keto-safe.
Serve the pork on low-carb buns like Mission Carb Balance or over a bed of shredded cabbage for a zero-carb option. The beef broth and onions are also keto-approved, but watch portion sizes if tracking macros closely. 🥬
Nutrition facts
Frequently asked questions
Can I use a smaller cut of pork instead of a 6 lb Boston butt?
The beauty of slow cookers is their flexibility! For a 4 lb Boston butt, reduce the cooking time to 4-5 hours on low. The key is maintaining the 203°F internal temp—just check with a meat thermometer. Smaller cuts like 2-3 lb pork shoulder work too, but they'll be ready in 3-4 hours on low. Always plan for ½ lb pork per person to account for bone weight and shrinkage.
What if my slow cooker doesn't have a "low" setting?
No problem! Set it to high for 8 hours instead—just monitor the temperature after 4 hours to ensure it doesn't overcook. If your slow cooker runs hot, check at 3 hours instead. The goal is 203°F internal temp, not strict timing. Pro tip: Place the pork in a cooking bag to retain moisture if you're concerned about drying out.
How do I keep the pork from getting dry when reheating?
Reheat shredded pork with 2 tbsp broth or water per cup of meat in a saucepan on low heat for 5-10 minutes. For microwave reheating, cover with a damp paper towel and heat in 1-minute intervals until warm. The honey glaze helps retain moisture—always add a splash of juice from the original cooking. Never reheat dry; if it's too stiff, stir in 1 tsp apple cider vinegar to revive tenderness.
Can I make this recipe in an Instant Pot or electric pressure cooker?
Use the high pressure setting for 90 minutes after searing, then do a natural release for 15 minutes before quick release. The pressure method cuts cooking time dramatically while keeping the meat tender. For the brine and rub, follow the same steps—but reduce the cooking time by 50% compared to slow cooker instructions. The Instant Pot version works beautifully for weeknight meals!
Why does my pulled pork sometimes turn out stringy?
Stringy pork usually means it cooked too long or wasn't rested properly. Always check the 203°F internal temp—don't rely on time alone. Let the pork rest for 15-20 minutes after cooking before shredding to redistribute juices. If it's still tough, try adding 1 tbsp apple cider vinegar when reheating to help break down fibers. The bone-in cut should stay moist if cooked correctly!