
Sauces & Condiments
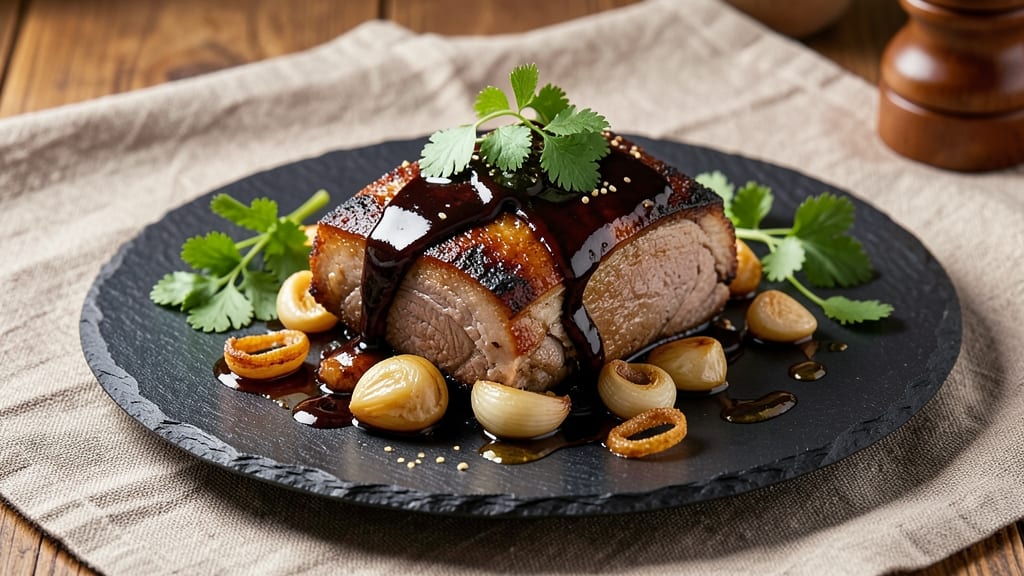
This braised pork in soy sauce recipe transforms tough cuts into melt-in-your-mouth perfection through slow simmering and caramelized edges. 🔥 As someone who's spent years perfecting pork braises in my Atlanta kitchen, I can tell you the secret lies in high-heat searing followed by a long, gentle cook that develops deep umami flavors.
The result? Rich, tender pork that falls apart with every bite, bathed in a glossy soy-infused sauce.
The beauty of this method is its versatility—it works equally well with pork shoulder, pork belly, or even tougher cuts like pork butt. We'll start with a proper sear to build flavor, then slow-cook until the meat becomes irresistibly tender.
The soy sauce creates that signature glossy finish while adding layers of savory depth that make this dish unforgettable. This isn't just another braise; it's a technique that turns simple pork into something restaurant-worthy.
What makes this recipe particularly special is how the edges develop that coveted crispness through the final stages of cooking, while the interior remains perfectly tender. The sauce reduces to a perfect consistency that clings to every bite, delivering maximum flavor with minimal effort.
Whether you're serving this for a family dinner or meal prepping for the week, the results are consistently impressive.
Pair it with steamed jasmine rice to soak up every bit of that flavorful sauce, or serve alongside roasted vegetables for a complete meal. The technique is straightforward, but the results speak for themselves—this is the kind of dish that becomes a staple in any home kitchen.
Let's get started on creating your perfect braised pork.
Ingredients for braised pork in soy sauce
Here's what you'll need to make melt-in-your-mouth braised pork with crisp edges and rich soy sauce.
| Ingredient | Amount | Notes |
|---|---|---|
| Pork Shoulder 🐖 | 2 ½ lb | Bone-in, cut into 2-inch chunks |
| Light Soy Sauce 🥢 | ½ cup | Kikkoman preferred for balance |
| Dark Soy Sauce 🥢 | 1 tbsp | For depth and color |
| Sesame Oil 🫒 | 1 tbsp | Toasted, for aroma |
| Brown Sugar 🍚 | ¼ cup | Lightly packed |
| Garlic Cloves 🧄 | 6 cloves | Minced, for bold flavor |
| Fresh Ginger 🌿 | 2 tbsp | Finely grated, peeled |
| Green Onions 🧅 | 3 whole | Sliced, for freshness |
| Vegetable Oil 🫒 | 2 tbsp | High smoke point |
| Cornstarch 🌾 | 1 tbsp | For sauce thickening |
| Water 💧 | ½ cup | Room temperature |
| Red Chili Flakes 🌶️ | ½ tsp | Optional, for heat |
| Salt 🧂 | 1 tsp | Kosher or sea salt |
| Black Pepper 🌶️ | ½ tsp | Freshly ground |
The pork shoulder is non-negotiable here—it's the star of the show. Look for bone-in cuts at your local butcher shop or the meat department at Whole Foods or Kroger. The bone adds flavor, and the fat keeps the meat moist during the long cook. If you can't find bone-in, bone-in pork butt works too. Just ask for it cut into 2-inch chunks so it cooks evenly. The soy sauce? Kikkoman light soy is my go-to—it's balanced and widely available, but any good-quality light soy will do. Dark soy adds color and depth, so don't skip it if you can find it.
No sesame oil? Toasted peanut oil works in a pinch—just add it at the end for aroma. Running low on brown sugar? White sugar at the same amount is fine, but the molasses notes in brown sugar are what make this sauce special. The garlic and ginger are where the magic happens—fresh is non-negotiable. If you've got a microplane, use that for the ginger to get fine, even shreds. No microplane? A grater works, but you'll need to sift out the pulp. The green onions are for freshness at the end—don't cook them with the pork, or they'll turn bitter.
This sauce gets better the next day, so make extra if you can. Store leftovers in an airtight container in the fridge for up to 5 days, or freeze for 3 months. The pork reheats beautifully—just warm it gently in the sauce. I always portion mine into meal prep containers so I can grab it straight from the fridge for lunch. The sauce thickens as it cools, so if it seems too thick when reheating, just add a splash of water or broth.
Why You'll Love This Recipe
- One-Pot Magic: I swear by this recipe—just chop the pork shoulder into chunks, toss it in a Dutch oven with the soy sauces, and let it simmer. No extra pans, no fuss, and honestly? That’s my kind of cooking.
- Umami Bomb: The combo of light and dark soy sauce? Chef’s kiss. The dark sauce gives it that glossy, caramelized depth, while the light keeps it bright and savory. Add a splash of sesame oil at the end, and suddenly, you’ve got flavor that sticks around.
- Leftovers That Shine: This stuff tastes better the next day—no joke. I make a big batch on Sundays, and by Wednesday, it’s still the star of my lunch. (Between us, I’ve even sent it in packed lunches. It’s that good.)
- Budget Winner: Pork shoulder is cheap, and this recipe stretches it into something restaurant-worthy. A few tablespoons of soy sauce and brown sugar turn it into a meal that feels special—without breaking the bank. My wallet thanks me every time.
Step-by-step instructions for braised pork in soy sauce
Here's how to transform tough pork shoulder into melt-in-your-mouth perfection with caramelized edges.
🍳 Step 1: Sear the Pork Shoulder for Deep Flavor
Heat the 2 tablespoons vegetable oil in a large Dutch oven over medium-high heat until shimmering. Working in batches if needed, add the 2.5 lb pork shoulder cut into 2-inch chunks, letting each piece develop a deep golden-brown crust on all sides. This takes about 8-10 minutes total—don't rush it, or you'll end up with pale, flavorless meat.
Real talk: I press down gently on the pork with a spatula during the first minute of searing—this prevents it from curling and ensures even contact with the pan. Once each piece is golden brown and releases easily from the pan, transfer them to a plate and set aside. You'll know it's ready when you see those beautiful caramelized patches forming.
👨🍳 Step 2: Build the Umami-Packed Sauce Base
In the same Dutch oven (don't wipe out those flavorful browned bits!), add the 6 cloves minced garlic cloves and 2 tablespoons finely grated fresh ginger. Cook for 1-2 minutes until fragrant—you should smell that bright, zesty aroma wafting through your kitchen. Be careful not to let them burn; they'll darken quickly.
Now add the 0.5 cup light soy sauce, 1 tablespoon dark soy sauce, 0.25 cup brown sugar, 1 teaspoon salt, 0.5 teaspoon black pepper, and 0.5 teaspoon red chili flakes (if using). Stir to combine and let the mixture bubble gently for 2 minutes until the sugar begins to dissolve and the aromatics release their flavors into the sauce.
🔥 Step 3: Braise Until Fork-Tender
Return the seared pork to the Dutch oven, along with any accumulated juices. Pour in the 0.5 cup room temperature water, then add the 1 tablespoon sesame oil. Bring everything to a gentle simmer over medium-low heat, then reduce to the lowest setting possible—you're aiming for a barely bubbling surface. Cover tightly with a lid and let it cook for 2.5-3 hours.
Here's the thing—this is where patience pays off. The pork needs time to break down and absorb all that delicious sauce. I check it every 30 minutes to ensure there's still some liquid in the pan (add a splash of water if needed). When the pork is fork-tender—meaning it slides off the bone with just a gentle prod—it's ready for the final step. If you're unsure, check the internal temperature with a meat thermometer; it should read 195-205°F in the thickest part.
🥘 Step 4: Thicken the Glazed Sauce
Once the pork is tender, carefully remove the meat and set it aside on a plate. Increase the heat to medium-high and skim off any excess fat from the sauce (if needed). In a small bowl, whisk together the 1 tablespoon cornstarch with 2 tablespoons water until smooth, then gradually stir it into the braising liquid. Let it simmer for 3-5 minutes until the sauce thickens to a glossy, coatable consistency.
Return the pork to the Dutch oven and toss everything together to coat the meat evenly with the sauce. Taste and adjust seasoning if needed—you might want to add a splash more soy sauce or a pinch of sugar to balance the flavors. Let the pork sit in the sauce for another 5 minutes off the heat so it can soak up all that glorious liquid.
🍽️ Step 5: Serve with Crisp Edges and Silky Meat
Transfer the pork and sauce to a serving platter. Garnish with the 3 whole sliced green onions for a pop of freshness and color. The pork should have crisp edges from the initial sear and a tender, juicy interior that practically melts in your mouth. Serve immediately over steamed rice or noodles, letting diners spoon up that rich, caramelized sauce.
Pro tip: If you have leftovers, they actually taste even better the next day as the flavors continue to meld. Store them in the fridge for up to 3 days, reheating gently in a skillet with a splash of water to restore that silky texture.
Pro Tips For Making Braised Pork In Soy Sauce
- SEAR FIRST, LOW AND SLOW: The pork shoulder needs a proper crust—don’t skip the initial sear. After browning, drop the heat to 275°F (135°C) and cover the pot. Too much heat early? You’ll end up with dry, overcooked meat. Patience here makes all the difference.
- USE DARK SOY SAUCE LAST: Dark soy sauce adds color and depth, but add it only in the final 10 minutes. Toss it in too early, and the sauce burns, turning bitter. Save it for when the pork is nearly tender—just enough to glaze the meat and caramelize the sauce.
- SKIP THE CROWDED POT: If you pile all the pork shoulder pieces in at once, they’ll steam instead of brown. Work in batches—sear half, remove, then repeat. Overcrowding = soggy meat, not crispy edges.
- BROWN SUGAR NEEDS TIME: Don’t just dump brown sugar in and stir—let it melt and caramelize for 2-3 minutes. I used to rush this, and the sauce stayed cloyingly sweet. A quick deglaze with a splash of water after browning the sugar deepens the flavor. It’s worth the wait.
Best sauces and condiments for this dish
Soy Sauce Mastery
This recipe's soul comes from the soy sauce blend—where Kikkoman light soy provides that clean, salty foundation while dark soy adds depth and a rich mahogany hue. I always toast my dark soy in the pan for 30 seconds before adding other ingredients to deepen its caramel notes.
For extra complexity, add 1 teaspoon of fish sauce (like Red Boat) to the braising liquid—it amplifies umami without overpowering. 🥢
Sweet-Savory Balance
The brown sugar isn't just for sweetness—it's the secret to that glossy, sticky sauce. I prefer lightly packed brown sugar to avoid clumping, but if you're in a pinch, white sugar + ½ teaspoon molasses works.
For a deeper flavor, substitute ½ cup of coconut sugar—it caramelizes more dramatically during the braise. Taste the sauce before thickening: it should balance sweet, salty, and umami perfectly.
Umami Boosters
Want to take this to the next level? Add 1 tablespoon of oyster sauce or 1 teaspoon of mushroom powder to the braising liquid for an extra layer of savory depth.
I also love stirring in 1 teaspoon of hoisin sauce during the final 5 minutes of cooking—it adds a touch of sweetness and complexity. For heat lovers, swap the red chili flakes for 1 teaspoon of gochujang (Korean chili paste) for a smoky, spicy kick.
Thickening Secrets
The cornstarch slurry is key for that perfect, clingy sauce consistency. For a smoother finish, whisk the cornstarch with cold water before adding it to the hot sauce.
If your sauce thickens too much, simply add 1 tablespoon of water or pork broth and simmer until it reaches the right consistency. Pro move: Let the sauce reduce uncovered for the last 2 minutes to develop a glossy sheen.
Finishing Touches
Don't skip the sesame oil—it adds aroma and richness. For an elegant touch, drizzle with 1 teaspoon of toasted sesame seeds before serving. If you're serving this at a dinner party, garnish with thinly sliced scallions and a sprinkle of black sesame seeds for visual appeal.
The sauce pairs beautifully with steamed jasmine rice or buttery egg noodles to soak up every last drop. 💫
Nutrition facts
Frequently asked questions
Can I use pork belly instead of pork shoulder?
Pork belly works beautifully and adds extra richness. Cut it into 1-inch thick slices (skin-on for crispiness) and reduce the braising time to 1.5-2 hours—it cooks faster but still needs to be fork-tender. Just watch the skin: it should crisp up during the final 10 minutes uncovered.
Why does my sauce turn out too thin? This usually happens when the cornstarch slurry isn't properly activated.
How do I make this in a slow cooker?
Transfer the seared pork and sauce base to a 6-quart slow cooker, then add 0.5 cup water. Cook on LOW for 6-7 hours or HIGH for 4-5 hours until tender. For crisp edges, transfer the pork to a skillet and sear for 2 minutes per side before finishing with the sauce. The slow cooker version is perfect for hands-off meal prep!
What's the best way to reheat leftovers?
Always reheat gently to avoid drying out the meat. Place pork and sauce in a skillet over low heat with 1-2 tablespoons water or broth, covering for 5-7 minutes until warmed through. Microwaving works too, but add 1 tablespoon water and cover with a damp paper towel to keep it moist.
Can I substitute regular soy sauce for the light/dark blend?
You can use ½ cup regular soy sauce instead, but you'll miss the depth of dark soy. For best results, add 1 teaspoon molasses to mimic the caramel notes. The color will be lighter, but the flavor will still be rich. If you can find Japanese tamari, it's a great alternative for a gluten-free option.