
Soups & Stews
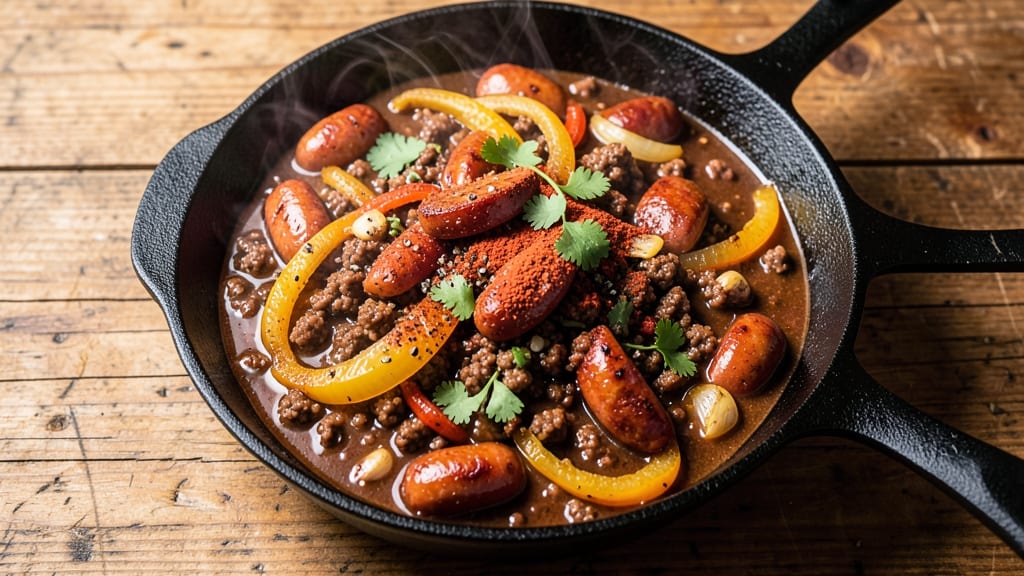
This chili recipe with ground beef and pork sausage delivers the kind of deep, smoky flavor that transforms a simple weeknight dinner into a hearty centerpiece. 🔥 The secret lies in slow-cooked meat that develops rich, caramelized edges while staying tender—exactly how my grandmother used to make it, but with modern shortcuts that keep it foolproof.
I’ve perfected this over years of testing, balancing the bold flavors of beef with the subtle sweetness of sausage for a perfect harmony.
The process starts with browning the meat—this critical step builds layers of flavor that simmer into something extraordinary. You’ll sauté onions, garlic, and bell peppers until soft, then add spices like cumin and chili powder to create a fragrant base.
The meat cooks low and slow, allowing all those flavors to meld together into a thick, velvety chili that only gets better as it sits.
By the time you’re done, you’ll have a pot of chili so rich and aromatic it’ll have everyone asking for seconds. The pork sausage adds a subtle sweetness that balances the beef’s depth, while the tomatoes and beans create a hearty texture.
Serve it with crusty cornbread or tortilla chips for the full experience—this is the kind of chili that turns a regular night into a memorable meal.
Whether you’re feeding a crowd or meal prepping for the week, this recipe delivers restaurant-quality results with minimal effort. The slow cooking ensures tender meat and deep flavor, while the simple ingredients make it easy to customize. Let’s make chili night unforgettable.
Ingredients for chili recipe with ground beef and pork sausage
Six servings of rich, smoky chili—just these ingredients and slow cooking magic.
| Ingredient | Amount | Notes |
|---|---|---|
| Ground Beef (80% lean) 🥩 | 1 ½ lb | Browned and drained well |
| Pork Sausage (Sweet or Spicy) 🌭 | 1 lb | Crumble before cooking |
| Yellow Onion 🧅 | 1 whole | Diced into small pieces |
| Bell Pepper (Any Color) 🌶️ | 1 whole | Diced into small pieces |
| Garlic Cloves 🧄 | 4 cloves | Minced finely |
| Chili Powder 🌶️ | 2 tbsp | Use smoky chili powder |
| Ground Cumin 🌿 | 1 tbsp | Toasted for deeper flavor |
| Paprika 🌶️ | 1 tbsp | Sweet or smoked |
| Dried Oregano 🍃 | 1 tsp | Mexican oregano preferred |
| Salt 🧂 | 1 ½ tsp | Kosher or sea salt |
| Black Pepper 🌶️ | ½ tsp | Freshly ground preferred |
| Tomato Paste 🍅 | 2 tbsp | Squeeze tube works fine |
| Diced Tomatoes (Canned) 🍅 | 2 cups | San Marzano if possible |
| Beef Broth 💧 | 2 cups | Low-sodium preferred |
| Black Beans (Canned) 🫘 | 1 cup | Drained and rinsed |
| Kidney Beans (Canned) 🫘 | 1 cup | Drained and rinsed |
| Olive Oil 🫒 | 2 tbsp | Extra-virgin for richness |
The meat is non-negotiable here. Ground beef with 20% fat gives you that deep flavor—leaner cuts won't brown right. I grab mine from Costco in bulk, but any butcher section works. The pork sausage? Sweet Italian adds just enough brightness to cut through the beef's richness. If you can't find sweet, spicy kielbasa crumbled works too. Pro tip: brown both meats separately so the sausage doesn't turn the beef into a soggy mess. Look for good marbling in the beef—it's what makes chili sing.
No chili powder? Cumin plus smoked paprika at 1 tbsp each gets you close. The tomato paste might seem like overkill, but trust me—it's what makes this chili thick and rich. Trader Joe's has the best squeeze tubes for this. Running out of beans? Lentils or pinto beans work in a pinch. The broth matters too—low-sodium so you can control the salt. If you've got homemade stock, use that instead. And for the love of chili, don't skip the garlic—it's what makes this recipe unforgettable.
This chili tastes even better the next day—honestly, it's the best part. Keeps 4-5 days in the fridge, freezes for 3 months. I always make a double batch because it disappears fast. Store in glass containers (plastic absorbs odors), and portion into individual servings so you can grab it straight from the freezer. The beans and tomatoes? Drain them well before adding, or you'll end up with a watery chili. Leftovers reheat beautifully—just add a splash of broth if it's too thick.
Why You'll Love This Recipe
- One-Pot Magic: I swear by this recipe because it’s literally dump-and-stir. Brown the beef and sausage, toss in the onions, peppers, and garlic—no fancy techniques, just letting the flavors meld while you chop veggies for the side. My lazy nights thank me every time.
- Savory Depth: That combo of 80% lean beef and pork sausage? Rich, smoky, and just a little sweet when you use the right sausage. The bell peppers add a bright crunch, and the garlic? Oh, it builds—layered heat that lingers. Honestly, it’s the kind of chili that makes you pause mid-bite.
- Meal Prep MVP: This chili tastes even better the next day—perfect for batch cooking. I make a double batch on Sundays, freeze half, and still have leftovers for lunch. It’s my go-to for game days, potlucks, or when I’m too tired to think. (Yes, even on a Tuesday night.)
- Budget-Friendly Powerhouse: Ground beef and pork sausage stretch far—this recipe feeds four for under $10, and the flavors pack a punch. Plus, the onions and peppers bulk it up without breaking the bank. It’s my secret weapon for feeding a crowd without stressing over costs.
Step-by-step instructions for hearty chili with smoky depth
Here's how to build rich, complex chili that deepens in flavor as it simmers.
🔥 Step 1: Build the Flavor Base with Meat and Aromatics
Heat the 2 tablespoons olive oil in a large Dutch oven over medium-high heat until shimmering. Add the 1.5 lb ground beef (80% lean) and 1 lb pork sausage (crumble it with your hands first), breaking it into small pieces. Cook for 6-8 minutes, stirring occasionally, until the meat is deep brown and no longer pink.
Here's the thing—don't drain the rendered fat yet. Those juices pack serious flavor. Once the meat is cooked, use a slotted spoon to transfer it to a plate, leaving all that delicious fat behind in the pot. This is where your chili's depth starts.
🍳 Step 2: Sauté the Aromatic Vegetables
In the same pot (with all that meat fat), add the 1 diced yellow onion and 1 diced bell pepper. Cook for 5-6 minutes until softened and slightly caramelized. Add the 4 minced garlic cloves and cook for another 30 seconds until fragrant.
This step develops the sweetness in the onions and peppers—don't rush it. You want them to soften but not burn. If they start sticking, just add a splash of beef broth to deglaze and scrape up those flavorful browned bits from the bottom.
🥘 Step 3: Develop the Spice Blend
Stir in the 2 tablespoons chili powder, 1 tablespoon ground cumin, 1 tablespoon paprika, 1 teaspoon dried oregano, 1.5 teaspoons salt, and 0.5 teaspoon black pepper. Cook for 1 minute to toast the spices and let their aromas bloom.
This is where the magic happens. The spices need to warm up so their flavors meld together. You'll smell that deep, earthy aroma—this is your chili's flavor foundation. Don't skip this step or your chili will taste flat.
🍳 Step 4: Simmer the Chili for Deep Flavor
Return the browned meat to the pot. Stir in the 2 tablespoons tomato paste, 2 cups diced tomatoes, and 2 cups beef broth. Bring to a gentle boil, then reduce heat to low and let it simmer uncovered for 30 minutes, stirring occasionally. This initial simmer lets the flavors blend.
After 30 minutes, add the 1 cup black beans and 1 cup kidney beans (drained and rinsed). Continue simmering for another 30-45 minutes until the chili has thickened and the flavors have really developed. The longer it simmers, the deeper the taste.
🔥 Step 5: Adjust and Serve
Taste your chili and adjust seasoning if needed. You might need a little more salt or chili powder to reach your preferred heat level. Let it cool for 10 minutes before serving—this allows the flavors to really meld together.
Serve with all the fixings: shredded cheese, sour cream, chopped cilantro, and crusty bread. The longer this chili sits, the better it gets—those flavors keep building. This is the kind of chili that tastes even better the next day!
Pro Tips For Making Chili Recipe With Ground Beef And Pork Sausage
- CRUMBLE FIRST, THEN BROWN: Brown your ground beef and pork sausage in two separate batches—yes, it takes twice as long, but that crispy crust on the pork sausage is worth the effort. I used to toss them in together, and the sausage just got greasy and soggy by the time the beef was done. Split the pan, and you’ll get that golden, meaty flavor you actually pay for.
- DICE SMALL, COOK LONG: Chop your onion, bell pepper, and garlic into tiny pieces—think rice-sized, not dice-sized. Small pieces cook faster and release flavor more evenly, so your chili won’t taste like you forgot to add them halfway through. I know, it’s tedious, but your chili will thank you with depth instead of just a hint of veggie aftertaste.
- DON’T DROWN THE MEAT: After browning, scrape up every last bit of that crusty goodness from the pan—it’s packed with flavor. Then, add your onions and peppers, but resist the urge to splash in all the liquid at once. Let them sweat out their moisture first, then add your tomatoes and broth. Too much liquid too soon turns your chili into a sad, watery stew.
- SALT THE SAUSAGE: Taste your pork sausage before adding it to the chili—especially if it’s pre-cooked or store-bought. Sweet sausage can be surprisingly bland, and spicy sausage might be over-salted. Sprinkle a pinch of salt directly onto the raw sausage while browning; it’ll help balance the flavors and prevent your chili from tasting flat or one-note later.
Pro cooking tips for this dish
Brown Meat Properly
This is where the magic starts—browning your beef and sausage until deep brown, not just pink. Use medium-high heat and break the meat into small pieces with your hands before cooking.
I like to cook the beef first for 6-8 minutes until it’s crispy around the edges, then remove it to a plate while keeping the fat in the pot. This fat becomes your flavor base! 🔥
Don’t skip browning the sausage separately if you’re using sweet or spicy varieties. The pork fat adds richness, but cooking it with the beef can make everything greasy.
Brown it in batches if needed, and watch closely—it cooks faster than beef. Trust me, this step makes all the difference in flavor depth.
Toast Your Spices
After removing the meat, add your chili powder, cumin, paprika, and oregano to the pot and cook for 1 minute on medium heat. This toasting step releases their natural oils and deepens their flavors.
You’ll smell that earthy, smoky aroma—this is your chili’s foundation. Don’t rush it, or the spices will taste flat. 🌶️
I often add a pinch of smoked paprika here for extra depth, especially if I’m making a big batch. The key is to let the spices warm up so they meld together before adding the tomatoes and broth. This simple step transforms your chili from good to unforgettable.
Simmer Low and Slow
Once everything is in the pot, reduce the heat to low and let it simmer uncovered for at least 1 hour. The longer it cooks, the richer the flavors become.
I usually simmer mine for 2-3 hours on the stove or 6-8 hours in a slow cooker. This is where the meat tenderizes and the spices meld into a harmonious blend.
Stir occasionally to prevent sticking, but don’t overdo it—you want those flavors to develop naturally. If the chili gets too thick, add a splash of beef broth to loosen it up. The goal is a thick, velvety texture with deep, smoky notes. Patience here is key!
Deglaze for Extra Flavor
If your meat browns beautifully but you see stuck-on bits at the bottom of the pot, don’t scrape them out with a spatula—deglaze instead! After removing the meat, add ½ cup beef broth to the pot and scrape up those flavorful browned bits.
This creates a rich, savory sauce that adds depth to your chili. It’s like liquid gold for flavor. 💛
I do this after browning the meat and again after sautéing the onions and peppers. It might seem like extra work, but it’s worth every second. Those browned bits are packed with flavor, and deglazing ensures none of it goes to waste.
Nutrition facts
Frequently asked questions
Can I substitute pork sausage with chicken sausage?
You can use chicken sausage, but the flavor will be milder and less rich. Pork sausage adds a subtle sweetness that balances the beef's depth. If using chicken, add an extra ½ teaspoon of smoked paprika to compensate for the lost richness. For best results, stick with pork—it's what gives this chili its signature hearty taste.
How do I make this chili in a slow cooker?
Brown the meat and sauté the aromatics in a skillet first, then transfer everything to your slow cooker. Add all remaining ingredients and cook on low for 6-8 hours or high for 3-4 hours. The slow cooker method actually enhances the flavors since everything cooks gently together. Just stir occasionally and adjust seasoning at the end.
What if my chili is too watery?
Simmer uncovered for 15-20 minutes longer to reduce the liquid. If it's still too thin, use a wooden spoon to mash some beans against the pot sides—this releases starch that thickens the chili. For immediate results, mix 1 tablespoon cornstarch with 2 tablespoons cold water, stir into the chili, and simmer for 5 minutes until thickened.
Can I add other proteins like bacon or chorizo?
Cook ½ lb bacon or ½ lb chorizo separately until crispy, then crumble and add to the chili with the other meats. Chorizo adds incredible smokiness, while bacon gives a salty crunch. Just reduce the pork sausage to ½ lb to maintain the right meat-to-liquid ratio. Remove any chorizo casing before adding.
How do I reheat leftovers without drying them out?
Add 2-3 tablespoons beef broth to each portion when reheating. Cover and warm on low heat or in the microwave at 50% power for 2-3 minutes. Stirring occasionally prevents drying. For best texture, reheat only until hot—overheating makes chili tough. This chili actually tastes better reheated than fresh!