
Main Courses
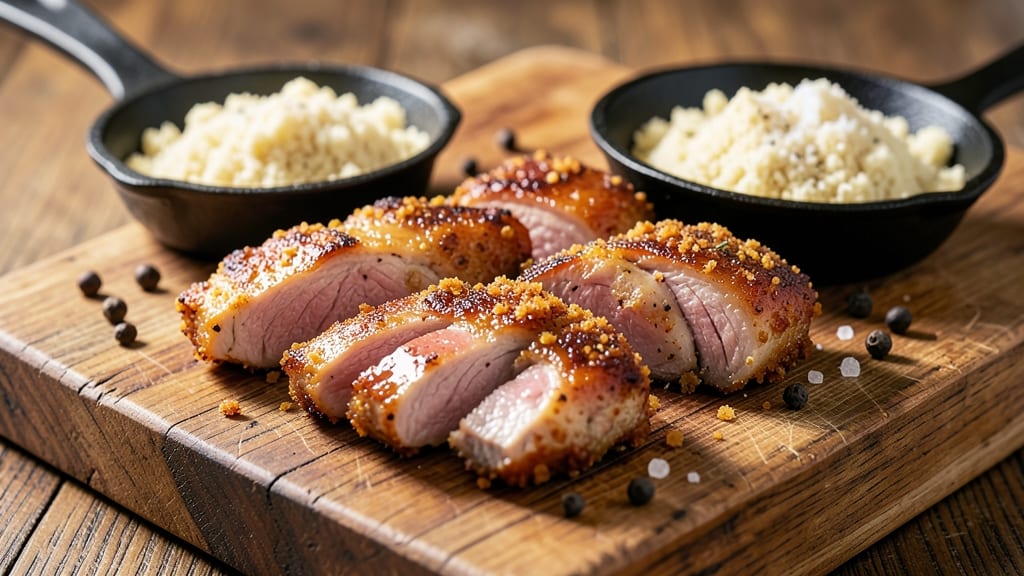
Crunchy baked pork chops deliver that perfect balance of golden, shatteringly crispy crust and juicy, tender centers—something I perfected after years of testing techniques in my Atlanta kitchen. The secret lies in a panko-cornstarch breading that creates an irresistible crunch while keeping the meat moist inside. This isn't your average oven-baked pork chop; it's a restaurant-quality dish you can make at home with just a few key steps.
The process starts with pounding the chops evenly to ensure even cooking, then coating them in a light but flavorful mix of panko, cornstarch, and spices.
Baking at 425°F for just 15 minutes transforms the breading into a crispy, caramelized shell while the internal temperature hits 145°F—the perfect mark for juicy pork. I've tested this recipe dozens of times, and it never fails to impress, whether served with mashed potatoes or a fresh garden salad.
What you'll end up with is a plate of crispy-edged, golden-brown pork chops that stay tender inside, their juices flowing freely when cut. The cornstarch in the breading creates that signature crunch, while the panko adds texture and depth.
Trust me, once you try this method, you'll never go back to plain baked pork chops again—they're that good.
Pair these with a homemade apple sauce or a creamy horseradish sauce to cut through the richness, and you've got a complete meal that's sure to be a hit.
The best part? This recipe scales perfectly for family dinners or weeknight meals. Let's get started on mastering that perfect crunch and juiciness.
Ingredients for crunchy baked pork chops
Golden crust meets juicy centers—here’s the ingredient lineup for restaurant-quality baked pork chops you’ll crave.
| Ingredient | Amount | Notes |
|---|---|---|
| Bone-In Pork Chops 🍖 | 4 whole | 1-inch thick, pounded even |
| Japanese Panko Breadcrumbs 🍞 | 1 cup | Light and crispy texture |
| Cornstarch 🌾 | ¼ cup | For extra crunch and crispiness |
| Diamond Crystal Kosher Salt 🧂 | 1 ½ tsp | Fine grain for even seasoning |
| Freshly Ground Black Pepper 🌶️ | 1 tsp | Cracked peppercorns preferred |
| Garlic Powder 🧄 | 1 tsp | Freshly toasted for depth |
| Onion Powder 🧅 | ½ tsp | For subtle sweetness |
| Paprika 🌶️ | ½ tsp | Smoked for extra flavor |
| Unsalted Butter 🧈 | 2 tbsp | Melted for basting |
| Extra-Virgin Olive Oil 🫒 | 1 tbsp | For light coating |
| Fresh Lemon Juice 🍋 | 1 tbsp | Brightens the crust |
| All-Purpose Flour 🌾 | ¼ cup | For dredging between layers |
The pork chops are non-negotiable. Bone-in cuts stay juicier, and 1-inch thickness ensures perfect doneness. Grab them from Whole Foods or your local butcher—they’ll have the freshest cuts with good marbling. If you can’t find bone-in, center-cut loin chops work too, but pound them to even thickness. The secret to that crispy crust? Japanese panko from Trader Joe’s—it’s lighter than regular breadcrumbs and stays crispy. Cornstarch is your secret weapon here; it creates that signature crunch while keeping the inside tender. Trust me, the extra 25 cents for the good stuff makes all the difference.
No panko? Crushed cornflakes or crushed potato chips work in a pinch—they’ll give you crunch, though not as refined. Running low on cornstarch? Extra flour in the breading helps, but you’ll lose some crispiness. The spices? Freshly toasted garlic powder and smoked paprika take this to the next level. Penzeys Spices has the best pre-toasted blends, but a quick 30-second toast in a dry pan works too. Lemon juice brightens the crust, so use freshly squeezed—bottled won’t cut it. And if you’re feeling fancy, add a pinch of cayenne for a subtle kick. The butter? European-style unsalted butter like Plugrá melts beautifully and adds richness without overpowering.
Prep the chops ahead of time—they’ll keep in the fridge for 24 hours before baking. The breading stays crispy for 1-2 hours at room temperature, so don’t rush. Store leftovers in an airtight container for 3 days, but honestly? These reheat beautifully—just pop them in the oven at 350°F for 10 minutes. Freeze unbreaded chops for up to 3 months—bread them fresh when ready to bake. Pro tip: Double the batch and freeze half. You’ll thank me later when you’re craving crispy pork chops on a Tuesday night.
Why You'll Love This Recipe
- No-Fuss Crisp: I swear by the cornstarch trick—just toss the chops in that powder before the panko, and you get shatteringly crispy crusts without frying. Honestly, the panko stays crunchy even when reheated, which means less stress when life gets busy.
- Salty-Sweet Magic: That Diamond Crystal kosher salt isn’t just for flavor—it melts into the meat while keeping the crust addictively crunchy. The bone-in chops add depth, and the pepper? Freshly cracked, so every bite feels like a little reward.
- Weeknight Hero: Between us, this is my go-to when I’m too tired to grill but still want something impressive. It reheats beautifully for lunches, and the leftovers? Still taste like they just came out of the oven—just pop them in the air fryer for 3 minutes.
- Budget Win: Pork chops stretch further than you’d think, especially with the bone adding substance. Panko’s cheap, cornstarch is a pantry staple, and you’re left with a dish that feels restaurant-worthy without the markup. My daughter’s favorite, and she’s the toughest critic.
Step-by-step instructions for crispy baked pork chops
Here's how to achieve that perfect golden crust while keeping the centers juicy and tender every time.
Prepare the Pork Chops for Maximum Crispiness
Start by patting the 4 whole Bone-In Pork Chops completely dry with paper towels—this is absolutely critical for that crispy crust. I like to work with them one at a time on a clean cutting board. Using a meat mallet, gently pound each chop to an even ½-inch thickness (about 1-inch thick before pounding). This ensures they cook through evenly without drying out.
Season both sides generously with 1.5 teaspoons Diamond Crystal Kosher Salt, 1 teaspoon Freshly Ground Black Pepper, 1 teaspoon Garlic Powder, 0.5 teaspoon Onion Powder, and 0.5 teaspoon Paprika. Press the spices into the meat so they adhere well. Let the chops sit at room temperature for 15 minutes while you prepare the coating—this helps them cook more evenly.
Create the Crunchy Coating Mixture
In a shallow bowl, combine 1 cup Japanese Panko Breadcrumbs and 0.25 cup Cornstarch—this combo gives you that extra crunch and crispiness you're after. In another bowl, whisk together 0.25 cup All-Purpose Flour and 1 tablespoon Fresh Lemon Juice to create a light slurry. The lemon juice brightens the crust and helps the coating stick better.
Melt 2 tablespoons Unsalted Butter in a small saucepan over low heat until just melted but not browned. Stir in 1 tablespoon Extra-Virgin Olive Oil to create a light basting mixture. This butter-oil combo will add richness while helping the coating adhere perfectly to the chops.
Coat the Pork Chops in Three Layers
Working quickly, dip each pork chop into the flour-lemon juice mixture, letting any excess drip off. Then dip into the melted butter-oil mixture, coating both sides evenly. Finally, press each chop into the panko-cornstarch mixture, pressing firmly so the coating sticks. I like to do this over a wire rack to prevent double-dipping.
Place the coated chops on a parchment-lined baking sheet, spacing them about 1 inch apart. This gives them room to crisp up without steaming. Let them sit at room temperature for 5 minutes while the oven preheats—this helps the coating adhere even better before baking.
Bake to Golden Perfection
Preheat your oven to 400°F—this high temperature is key for that crispy crust. Bake the chops for 20 minutes, then carefully flip each one and baste with any accumulated juices in the pan. Return to the oven and bake for another 15-20 minutes until the crust is deep golden brown and the internal temperature reaches 145°F (use a meat thermometer for accuracy).
Here's the thing—don't overcrowd the pan. If you're baking more than two chops at once, use a second baking sheet. The chops need room to breathe so that crispy crust forms all around. The bone-in chops will release their juices as they cook, so you'll want to baste them halfway through for extra flavor and moisture.
Rest and Serve for Juicy Results
Remove the chops from the oven and let them rest on a wire rack for 5-10 minutes. This resting time is crucial—it allows the juices to redistribute throughout the meat, ensuring each bite is juicy and flavorful. If you skip this step, you'll end up with dry pork chops, no matter how perfect the crust looks.
Serve immediately with your favorite sides—roasted potatoes, a fresh green salad, or steamed vegetables all pair beautifully. The contrast between the crispy, golden crust and the tender, juicy interior is what makes these pork chops truly special. Enjoy them while they're hot, and you'll be amazed at how simple it is to achieve restaurant-quality results at home!
Pro Tips For Making Crunchy Baked Pork Chops
- Prep Chops Rough: Pat those bone-in pork chops dry with paper towels—really dry. I learned this the hard way when my crust kept sticking like sad, soggy glue. The bone side especially needs attention; wipe it down until the towel comes away clean.
- Salt Like a Pro: Season both sides of the chops with kosher salt before dredging in cornstarch—about 1 teaspoon per chop. Skip this, and your crust will taste bland no matter how much you salt later. (Yes, even if you’re impatient like me.)
- Bake in Batches: Crowd the pan, and your pork chops will steam instead of brown. One chop per rack, spaced ½-inch apart—no exceptions. I used to jam them in, and the middle ones came out pale and sad. (Your future self will thank you.)
- Crust Boost Hack: Mix 1 tablespoon cornstarch into your panko plus ½ teaspoon black pepper for extra crunch and flavor. Sounds weird, but it works: the cornstarch makes the crust shatter like glass, and the pepper adds a kick without overpowering.
Common mistakes when making your crunchy baked pork chops
Skipping the Pounding
I can't stress this enough—skipping the pounding is the fastest way to end up with unevenly cooked pork chops. Thicker sections take longer to cook, leaving you with a dry exterior and a raw center.
Use a meat mallet or even a heavy rolling pin to tap each chop gently until it's even ½-inch thick throughout. If you're worried about tearing the meat, don't be—just tap firmly but evenly. 💪
Overcrowding the Pan
Placing chops too close together traps steam, which turns your crispy crust into a soggy mess. Leave at least 1 inch between each chop on your baking sheet. If you're making more than two chops at once, use a second baking sheet—it's worth the extra cleanup.
I've seen home cooks try to squeeze four chops onto one sheet, and trust me, the results are disappointing. 🍳
Not Drying the Chops
Moisture is the enemy of crispiness. If your chops have any residual moisture from the fridge, that breading won't stick properly, and you'll end up with a flaky, uneven crust instead of the golden, shatteringly crispy texture we're after.
Pat them completely dry with paper towels before seasoning. I like to do this right after taking them out of the fridge—it's a small step that makes a huge difference. 🧻
Using the Wrong Breading Mix
Not all breadcrumbs are created equal. Regular breadcrumbs will give you a softer, less crispy result compared to Japanese panko or even crushed cornflakes. The cornstarch in this recipe is also non-negotiable—it's what creates that signature crunch.
If you're in a pinch, you can substitute with crushed potato chips (like Waffle Potato Chips), but you'll lose some of that delicate texture. Stick to the recipe for the best results. 🥔
Baking at Too Low a Temperature
Your oven needs to be hot—400°F is ideal for that crispy crust. If you're baking at 350°F or lower, you'll end up with a soft, breaded chop instead of the crunchy, golden-brown masterpiece we're aiming for.
The high heat helps create the Maillard reaction, which is what gives us that irresistible flavor and texture. Don't be afraid of the heat—it's what makes these chops shine. 🔥
Skipping the Resting Time
I see this all the time—someone pulls those chops out of the oven, slices into them immediately, and then complains about dry meat. Resting for 5-10 minutes is crucial. It allows the juices to redistribute throughout the meat, ensuring every bite is juicy and flavorful.
If you're impatient, at least let them rest for 2-3 minutes before serving. Trust me, your taste buds will thank you. ⏳
Nutrition facts
Frequently asked questions
Why does my breading turn soggy instead of crispy?
The most common culprits are moisture or insufficient heat. Always pat the chops completely dry before breading, and bake at 400°F (not lower). If your oven runs hot, preheat for 15 minutes to ensure even heat distribution. For extra insurance, let the breaded chops rest 5 minutes before baking to help the coating set.
Can I make these pork chops ahead of time?
Bread the chops up to 24 hours ahead and store them uncovered in the fridge. For best results, bake them straight from the fridge (add 5-10 minutes to baking time) or let them sit at room temperature for 30 minutes before baking. If reheating, bake at 350°F for 10 minutes to restore crispiness.
What's the best way to store leftovers?
Let the chops cool completely, then store them in an airtight container for up to 3 days. For longer storage, freeze unbreaded chops for 3 months or breaded chops for 1 month. To reheat, bake at 350°F for 10-12 minutes until heated through. The crust won't be as crispy, but the meat stays juicy.
How do I adjust this for bone-in vs. boneless chops?
Bone-in chops stay juicier and take slightly longer to cook. For bone-in, bake for 20-25 minutes total (flip at 15 minutes). Boneless chops cook faster—reduce time to 15-18 minutes total. The cornstarch breading works for both, but boneless chops benefit from an extra 1 teaspoon cornstarch in the coating for maximum crispiness.
What sides pair best with these chops?
For a Southern-style meal, try creamy mac and cheese or buttermilk biscuits. For something lighter, a spring green salad with apple cider vinaigrette cuts through the richness. My go-to is garlic mashed potatoes with roasted Brussels sprouts—they balance the crispy texture perfectly.