
Main Courses
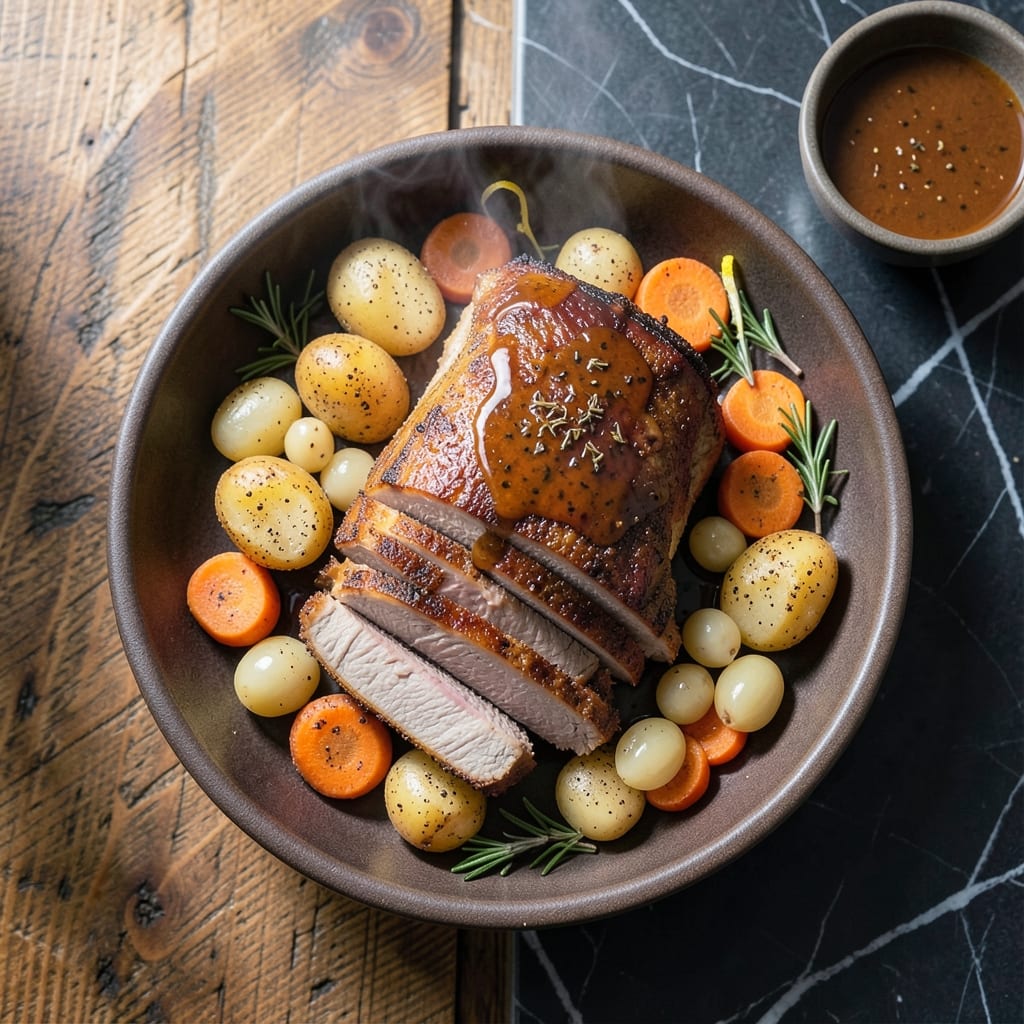
This Ninja cooker pork roast recipe delivers tender results with minimal effort. Growing up in Georgia, I learned that great pork doesn't need to be complicated. The multi-function cooker handles the hard work for you.
What sets this method apart is the precise temperature control. The Ninja cooker maintains consistent heat, ensuring your roast cooks evenly from edge to center. No more dry, overcooked pork.
You'll achieve fall-apart tenderness with a golden crust, all in one pot. The sealed environment locks in juices, creating a roast that's moist and flavorful throughout.
Perfect for Sunday suppers or busy weeknights. This approach proves that restaurant-quality pork is possible at home with the right tools.
Ingredients for ninja cooker pork roast
A few pantry staples and a pork shoulder are all you need for this melt-in-your-mouth roast.
| Ingredient | Amount | Notes |
|---|---|---|
| Pork Shoulder Roast 🥩 | 3 lb | Boneless, trimmed of excess fat |
| Kosher Salt 🧂 | 1 ½ tsp | Diamond Crystal preferred for even seasoning |
| Black Pepper 🌶️ | 1 tsp | Freshly ground for best flavor |
| Garlic Powder 🧄 | 1 tbsp | Not garlic salt substitute |
| Onion Powder 🧅 | 1 tbsp | Balances savory notes in rub |
| Smoked Paprika 🌶️ | 1 tbsp | Adds depth and color |
| Dried Thyme 🌿 | 1 tsp | Crushed between fingers to release oils |
| Olive Oil 🫒 | 2 tbsp | For searing and moisture |
| Chicken Broth 🥣 | 1 cup | Low-sodium for controlled seasoning |
| Apple Cider Vinegar 🍏 | 2 tbsp | Balances richness of pork |
| Brown Sugar 🍚 | 2 tbsp | Light or dark for caramelization |
| Yellow Onion 🧅 | 1 whole | Large, quartered for base |
| Carrots 🥕 | 3 whole | Peeled, cut into chunks |
The pork shoulder is non-negotiable here. Look for a well-marbled roast at Costco or your local butcher—fat equals flavor and tenderness. If buying pre-cut, ask for the Boston butt section. The rub spices should be fresh (smell them first—if they’re dull, toss them). I always keep Diamond Crystal salt on hand for even seasoning distribution.
No smoked paprika? Regular paprika plus a pinch of liquid smoke works in a pinch. Out of apple cider vinegar? White vinegar or lemon juice at the same amount. The brown sugar can be swapped for honey or maple syrup (though the flavor profile shifts slightly). For the broth, vegetable or beef broth both work—just watch the sodium if using store-bought.
Leftovers keep beautifully. Store in an airtight container in the fridge for up to 4 days or freeze for 3 months. The pork actually tastes better the next day (if it lasts that long). Reheat gently to preserve that fall-apart texture.
Why You'll Love This Recipe
- Set It & Forget: I toss the pork shoulder in with the salt, pepper, and powders, press a button, and let the Ninja do the work. No babysitting required.
- Garlic-Onion Magic: Honestly, the combo of garlic and onion powder with the pork creates this rich, savory depth that’s ridicously good.
- Feeds the Crew: Between us, this pulls apart so easily it’s my go-to for tacos one night, sandwiches the next, and soup by day three.
- Budget Stretcher: A cheap pork shoulder turns into three meals for my family of four. I’ll be real: that’s a win in my book.
Step-by-step instructions for Ninja Cooker pork roast
This no-fuss method delivers fall-apart pork with minimal effort and maximum flavor.
Create a Flavorful Rub for the Roast
In a small bowl, combine the 1.5 tsp Kosher Salt, 1 tsp Black Pepper, 1 tbsp Garlic Powder, 1 tbsp Onion Powder, 1 tbsp Smoked Paprika, and 1 tsp Dried Thyme. I crush the dried thyme between my fingers to release its aromatic oils as I blend.
Pat the 3 lb Pork Shoulder Roast completely dry with paper towels. This ensures the rub adheres properly and promotes even browning. Rub the spice mixture all over the pork, pressing it into the meat so it forms a flavorful crust. Let the seasoned roast sit at room temperature for 15-20 minutes while you prep the other ingredients.
Sear and Build the Cooking Liquid
Set your Ninja Cooker to the "Sear/Sauté" function. Add the 2 tbsp Olive Oil and let it heat until it shimmers. Sear the pork on all sides for 3-4 minutes per side until deeply browned. You'll know it's ready to turn when it releases easily from the pot—don't force it.
Once seared, remove the pork and set it aside. Add the 1 whole Yellow Onion (quartered) and 3 whole Carrots (peeled and cut into chunks) to the pot. Sauté for 2-3 minutes until they begin to soften and pick up the browned bits from the bottom. Pour in the 1 cup Chicken Broth, 2 tbsp Apple Cider Vinegar, and 2 tbsp Brown Sugar, stirring to combine.
Pressure Cook to Perfection
Return the seared pork to the pot, nestling it into the liquid and vegetables. Secure the lid and set the Ninja Cooker to "Pressure" on high for 60 minutes. The pork will become fork-tender as it cooks in this flavorful, aromatic liquid.
Once the cooking cycle completes, let the pressure release naturally for 10 minutes, then quick-release any remaining pressure. This natural release period allows the muscle fibers to relax, ensuring the pork remains juicy and tender rather than tough or dry.
Shred and Serve
Carefully remove the pork from the pot and transfer it to a cutting board. Using two forks, shred the meat into bite-sized pieces. It should pull apart effortlessly—this is how you know it's perfectly cooked. Discard any large fat chunks, though some marbling is fine for flavor.
Skim excess fat from the cooking liquid if desired, then return the shredded pork to the pot. Toss it in the liquid to coat evenly. The pork will absorb the rich, savory-sweet broth, making every bite burst with flavor. Serve immediately with the carrots and onions for a complete, hearty meal.
Pro Tips For Making Ninja Cooker Pork Roast
- Sear First: I learned this the hard way—skipping the sear on the pork shoulder in the Ninja Cooker leaves the roast pale and lacking depth. Crank it to "Sear/Sauté" for 3-4 minutes per side before pressure cooking.
- Season Overnight: Rub the pork with kosher salt, black pepper, garlic powder, and onion powder the night before. Sounds weird, but it works: the flavors penetrate deeper than a last-minute dusting.
- Don’t Overfill: After burning three batches, I finally figured out the Ninja Cooker needs at least 1 cup of liquid but no more than 2/3 full. Steer clear of overfilling—it’s a messy, dangerous mistake.
- Natural Release: My grandmother swore by this, and she was right: let the pressure release naturally for 10 minutes before quick-releasing. It keeps the pork shoulder from drying out.
Troubleshooting this recipe
Undercooked Pork
If your pork isn't tender after 60 minutes, don't panic. Return it to the Ninja Cooker with an additional ½ cup Chicken Broth and pressure cook for another 15-20 minutes. The extra liquid prevents burning while ensuring thorough cooking. 💡
Burn Notice
Seeing the "Burn" error? This usually means there wasn't enough liquid. Add 1 cup Chicken Broth, scrape the bottom to release any stuck bits, then restart. I always deglaze with a wooden spoon to prevent this.
Tough Texture
Overcooked pork can turn tough. If this happens, shred it and simmer in the cooking liquid for 10-15 minutes on the "Sauté" function. The moisture will help re-tenderize the meat. I learned this trick during my Charleston apprenticeship.
Weak Flavor
Bland results often mean under-seasoned rub. Next time, double the Kosher Salt and Smoked Paprika. For this batch, stir in 1 tsp Apple Cider Vinegar and 1 tbsp Brown Sugar before serving to brighten flavors.
Liquid Issues
Too much liquid? Remove the pork and reduce the sauce on "Sauté" for 5-7 minutes. Too little? Add ½ cup Chicken Broth and scrape the pot bottom. The Ninja Cooker works best with 1-1.5 cups liquid total. 🔥
Sealing Problems
If the lid won't seal, check the silicone ring for damage. Also ensure the steam release valve is set to "Sealing." I keep a spare ring in my kitchen drawer—it's a $15 lifesaver when you're mid-recipe.
Nutrition facts
Frequently asked questions
Can I use a different cut of pork?
Pork shoulder works best, but pork butt or picnic roast are good substitutes. Avoid lean cuts like tenderloin—they lack the fat needed for 60 minutes of pressure cooking.
Do I need to brown the meat first?
Yes! Searing creates a flavorful crust and deepens the overall taste. The 3-4 minutes per side on "Sear/Sauté" makes a noticeable difference in the final dish.
Can I cook this without the vegetables?
You can, but the onions and carrots add natural sweetness to the cooking liquid. If skipping, increase the Chicken Broth to 1.5 cups to prevent burning.
How do I store leftovers?
Keep in an airtight container in the fridge for up to 4 days. The flavors intensify overnight, making leftovers even more delicious.