
Recipes/Cooking
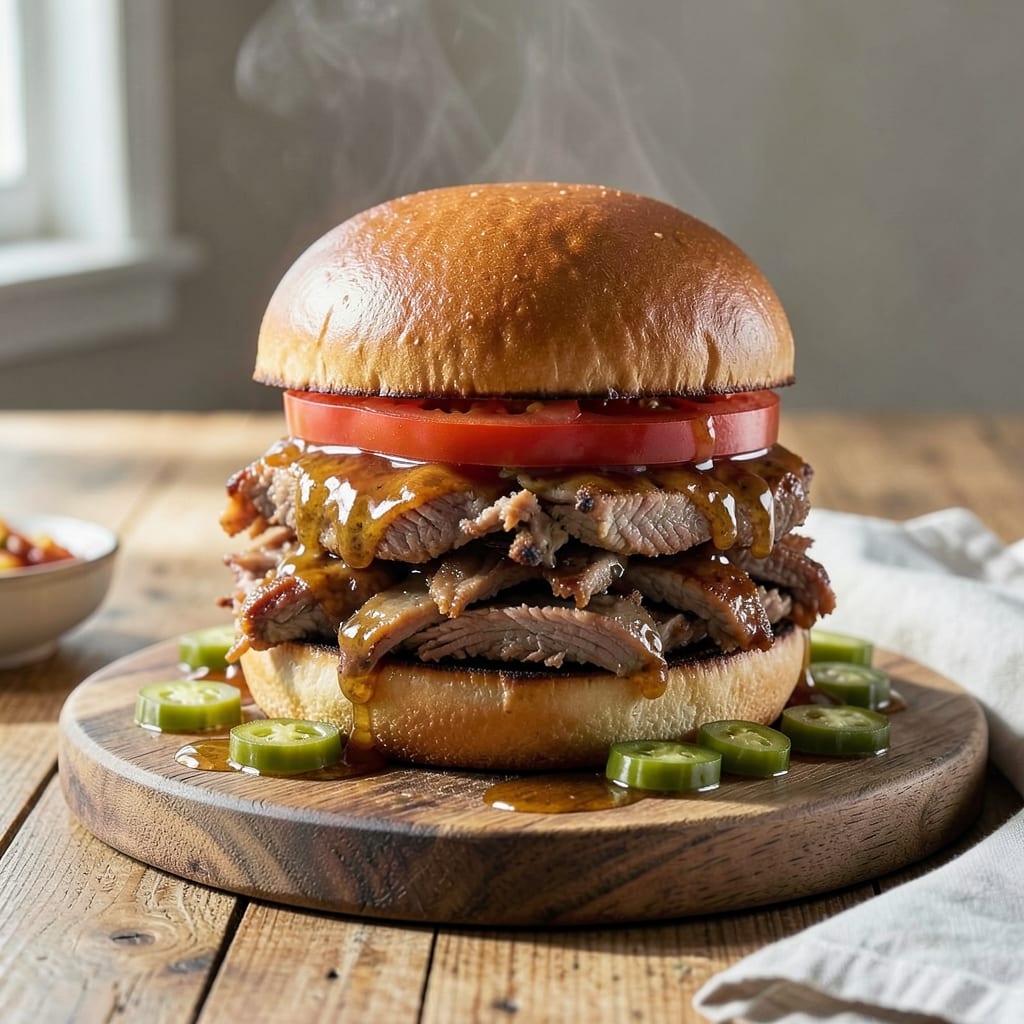
This pressure cooker pulled pork sandwich recipe delivers competition-level results in a fraction of the time. My championship-winning technique brings smoky, tender pork to your table without the long smoke.
The secret is a vinegar-based sauce that cuts through the richness while keeping the meat incredibly moist. I’ve perfected this method over years of pitmaster competitions, and it never fails to impress.
In just 90 minutes, you’ll have pork so tender it shreds with a fork, infused with bold, tangy flavors. The pressure cooker locks in every bit of juiciness.
Serve on soft slider buns for a sandwich that tastes like it came straight from the BBQ circuit. Here’s how to make it.
Ingredients for pressure cooker pulled pork sandwich
Pork shoulder, vinegar sauce, and soft buns. Competition-level flavor at home in no time.
| Ingredient | Amount | Notes |
|---|---|---|
| Pork Shoulder 🥩 | 3 lb | Boneless, fat trimmed |
| Apple Cider Vinegar 🍎 | ¾ cup | For tangy sauce base |
| Ketchup 🍅 | 1 cup | Quality brand preferred |
| Brown Sugar 🏝️ | ½ cup | Light or dark works |
| Yellow Mustard 🟡 | 2 tbsp | Smooth variety |
| Worcestershire Sauce 🫒 | 2 tbsp | Adds umami depth |
| Smoked Paprika 🌶️ | 1 tbsp | For smoky flavor |
| Garlic Powder 🧄 | 1 tbsp | Not garlic salt |
| Onion Powder 🧅 | 1 tbsp | Balances sweetness |
| Salt 🧂 | 1 tbsp | Kosher or sea salt |
| Black Pepper 🌶️ | 1 tsp | Freshly ground preferred |
| Chicken Broth 🍲 | 1 cup | Low-sodium preferred |
| Slider Buns 🍞 | 12 pieces | Soft, slightly sweet |
| Coleslaw Mix 🥬 | 2 cups | Pre-shredded for ease |
| Mayonnaise 🥚 | ½ cup | For coleslaw dressing |
The pork shoulder is non-negotiable here—bone-in adds flavor but boneless is easier to shred. Costco has great prices for large cuts, or ask your butcher to trim the fat cap. Look for good marbling; that fat renders down into pure flavor. I’ve used both Boston butt and picnic shoulder—both work, but Boston butt has more fat (in a good way).
No apple cider vinegar? White vinegar in a pinch, but the cider adds sweetness. Swap ketchup for tomato paste plus sugar if needed. Want more heat? Add cayenne or hot sauce to the sauce. The Worcestershire can be soy sauce for a different umami, but it won’t be quite the same. Skip the pre-made BBQ sauce—homemade tastes better here.
Pork keeps 4-5 days in the fridge, freezes beautifully for 3 months. Shred before storing for easiest reheating. The sauce thickens as it cools—just warm with a splash of broth to loosen. Buns? Toast just before serving (don’t store assembled).
Why You'll Love This Recipe
- Set It & Forget: I toss everything in the pressure cooker and walk away—no babysitting, just tender pork in a fraction of the time.
- Sweet & Tangy Bite: The brown sugar and apple cider vinegar hit that perfect balance, while the mustard and ketchup give it a smoky depth.
- Feeds a Hungry Crowd: I make a big batch for game day or meal prep—piles onto buns, stuffs tacos, or tops nachos. Versatile doesn’t cover it.
- Leftovers for Days: Honestly, it tastes even better the next day. One pork shoulder stretches into sandwiches, quesadillas, and salads all week.
Step-by-step instructions for pressure cooker pulled pork sandwiches
Here's how I make fall-apart tender pork with minimal effort and maximum flavor.
Season and Sear the Pork Shoulder
Cut the 3 lb Pork Shoulder into 3-4 large chunks for better seasoning penetration. Pat the pieces dry with paper towels—this ensures a proper sear. Rub each piece with 1 tbsp Salt, 1 tsp Black Pepper, 1 tbsp Smoked Paprika, 1 tbsp Garlic Powder, and 1 tbsp Onion Powder until fully coated.
Set your pressure cooker to sauté mode and add a splash of oil. Sear the pork chunks on all sides until deeply browned, about 3-4 minutes per side. This builds a flavor foundation that makes all the difference. Don't skip this step—it's what gives the finished pork its rich, caramelized depth.
Pressure Cook with Tangy Sauce
Pour 1 cup Chicken Broth into the pressure cooker and use a wooden spoon to scrape up all the browned bits from the bottom. This deglazing step prevents burning and adds incredible flavor to the cooking liquid.
In a bowl, whisk together 0.75 cup Apple Cider Vinegar, 1 cup Ketchup, 0.5 cup Brown Sugar, 2 tbsp Yellow Mustard, and 2 tbsp Worcestershire Sauce until smooth. Pour this sauce over the pork. Secure the lid and cook on high pressure for 60 minutes.
Shred and Sauce the Pork
Once the cooking time is complete, let the pressure release naturally for 15 minutes, then quick-release any remaining pressure. Remove the pork to a cutting board and shred it using two forks—it should come apart with almost no resistance.
Return the shredded pork to the pressure cooker and stir it into the cooking liquid. If the sauce seems thin, simmer it uncovered for 5-10 minutes until it thickens to your desired consistency. The pork should be glossy and coated in the rich, tangy sauce.
Assemble the Slider Sandwiches
While the pork finishes, make the coleslaw by mixing 2 cups Coleslaw Mix with 0.5 cup Mayonnaise. Season with a pinch of Salt and Black Pepper to taste. The slaw adds a cool, crunchy contrast to the rich pork.
To assemble, spoon the pulled pork onto the bottom halves of the 12 pieces Slider Buns, top with a generous amount of coleslaw, and cap with the remaining bun halves. Serve immediately while the pork is still warm and saucy. Each bite should deliver tender pork, tangy sauce, and crisp slaw in perfect harmony.
Pro Tips For Making Pressure Cooker Pulled Pork Sandwich
- Trim the Fat: Cut off any large fat caps from the pork shoulder before cooking—it prevents a greasy sauce and helps the flavors penetrate the meat better.
- Deglaze First: After browning the pork, pour in a splash of apple cider vinegar to scrape up the browned bits; it adds depth to the sauce and saves you from scrubbing later.
- Skip the Overfill: Never exceed the pressure cooker’s max fill line—I learned this the hard way when my first batch of pulled pork turned into a foamy, overflowing mess.
- Shred While Hot: Pull the pork apart right after cooking while it’s still warm; it absorbs the sauce better and saves you from fighting cold, stubborn chunks later.
Dietary considerations for these flavors
Gluten-Free Options
For gluten-free needs, swap the slider buns for gluten-free hamburger buns—I like Canyon Bakehouse brand. Ensure your Worcestershire sauce is gluten-free, as many contain malt vinegar. Lea & Perrins offers a gluten-free version. 💪
Lower Sugar Version
To reduce sugar, cut the brown sugar in half and replace with 1/4 cup sugar-free maple syrup. Use sugar-free ketchup—G Hughes makes a great one. The vinegar and spices will still deliver bold flavor.
Dairy-Free Adjustments
Make the coleslaw dairy-free by using vegan mayonnaise—Hellmann's Vegan works perfectly. The pulled pork itself is naturally dairy-free, so no other changes are needed. This keeps all the smoky, tangy goodness intact.
Low-Carb/Keto Adaptation
Skip the buns and serve the pork over a bed of shredded lettuce or in butter lettuce wraps. Reduce the brown sugar to 2 tbsp and add 1 tsp liquid stevia for sweetness. The vinegar sauce still shines with minimal carbs. ⚡
Pork Alternatives
For non-pork eaters, try chicken thighs—use the same cooking time and sauce. The texture won’t be identical, but the flavors work beautifully. I’ve used this method with beef chuck roast too, increasing pressure time to 90 minutes.
Nutrition facts
Frequently asked questions
Can I use pork loin instead of shoulder?
Shoulder is best for its fat content, but loin works if that's what you have. Reduce cooking time to 45 minutes to prevent drying out. Loin lacks fat, so add 1/2 cup extra broth for moisture.
Why sear the pork first?
Searing creates a flavor base through caramelization, adding depth to the final dish. It only takes 3-4 minutes per side but makes a huge difference in taste. Don’t skip this step!
Can I make this in a slow cooker?
Yes, but expect 8-10 hours on low. The pressure cooker method cuts this to 90 minutes total. Slow cooking works, but the vinegar sauce may need reducing afterward.