
Main Courses
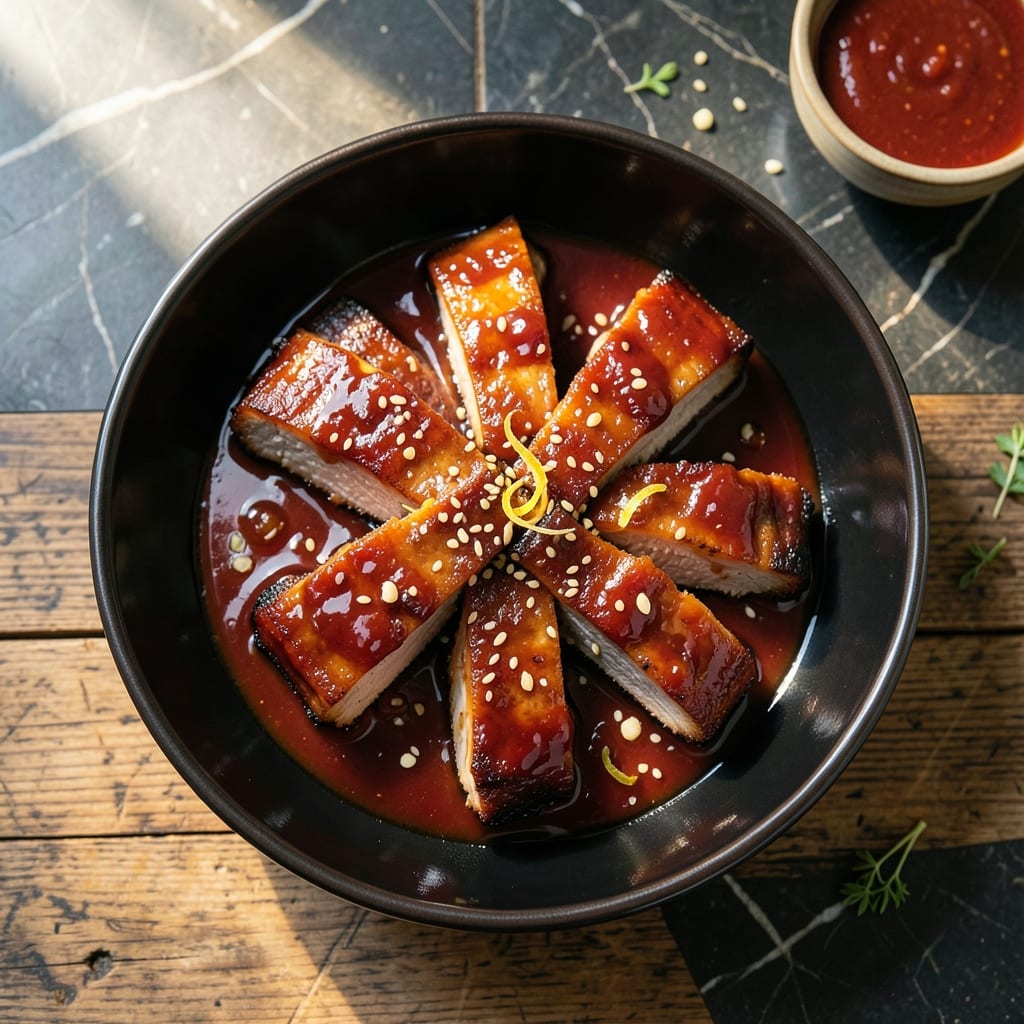
This sweet and sour pork ribs oven recipe delivers sticky, fall-off-the-bone results without the grill. Growing up in Georgia, I learned that great ribs start with patience and the right glaze.
The oven does most of the work here, slowly rendering the fat while a homemade sweet and sour sauce caramelizes into a glossy coat. No babysitting required—just set it and let the heat work its magic.
What you get are tender ribs with a perfect balance of tangy and sweet, the glaze clinging to every bite. The aroma alone will have the whole house gathering around the kitchen.
Serve with rice or coleslaw for a complete meal. Here’s how to make them.
Ingredients for Sweet and Sour Pork Ribs Oven
Nothing exotic here—just ribs and a glaze that does all the talking.
| Ingredient | Amount | Notes |
|---|---|---|
| Pork Baby Back Ribs 🥩 | 2 lb | Full rack, membrane removed |
| Ketchup 🍅 | 1 cup | For sauce base |
| Apple Cider Vinegar 🍏 | ¼ cup | For tangy balance |
| Brown Sugar 🍚 | ¾ cup | Packed, for sweetness |
| Soy Sauce 🥢 | ¼ cup | Low-sodium preferred |
| Garlic Cloves 🧄 | 4 cloves | Minced for sauce |
| Fresh Ginger 🌿 | 1 tbsp | Grated or minced |
| Pineapple Juice 🍍 | ½ cup | Canned or fresh |
| Olive Oil 🫒 | 2 tbsp | For brushing ribs |
| Onion Powder 🧅 | 1 tsp | For dry rub |
| Paprika 🌶️ | 1 tsp | Smoked or sweet |
| Salt 🧂 | 1 tsp | Kosher or sea salt |
| Black Pepper 🌶️ | ½ tsp | Freshly ground |
| Cornstarch 🌾 | 1 tbsp | For thickening sauce |
| Red Bell Pepper 🌶️ | 1 whole | Diced, for sauce |
The ribs are everything here. Baby back ribs give you that tender, fall-off-the-bone texture Georgia folks swear by. Look for racks with good marbling at Costco or your local butcher (they’ll remove the membrane for you). The membrane is that tough white layer on the bone side—peel it off for maximum tenderness (worth the extra minute).
No apple cider vinegar? White vinegar in a pinch, but the cider adds depth. Brown sugar can be swapped for honey or maple syrup (adjust to taste). Fresh ginger is ideal, but ground ginger at half the amount works. The pineapple juice? Orange juice gives a different but still great sweet-tangy balance. Skip the cornstarch if you like a thinner glaze.
The ribs are best the day they’re made, but leftovers keep 3-4 days in the fridge. Reheat in the oven at 350°F to keep them from drying out. The sauce thickens as it cools—just stir in a splash of water if needed. Freezes beautifully for 3 months (portion before freezing).
Why You'll Love This Recipe
- Hands-Off Cooking: I toss the ribs with the sauce, pop them in the oven, and let the heat do the work—no babysitting required.
- Sticky-Sweet Perfection: The brown sugar and ketchup caramelize into this glossy, finger-licking glaze that clings to every bite.
- Crowd-Pleaser Guaranteed: Honestly, I’ve served this at backyard BBQs and weeknight dinners, and the platter’s always scraped clean.
- Leftovers? Even Better: The flavors deepen overnight, so yesterday’s ribs taste like a whole new meal for lunch today.
Step-by-Step Instructions for Sweet and Sour Pork Ribs Oven Recipe
Here's my easy method for fall-off-the-bone ribs with that perfect sticky sweet and sour glaze.
Season and Pre-Bake the Pork Baby Back Ribs
Preheat your oven to 325°F. Pat the 2 lb Pork Baby Back Ribs dry with paper towels to ensure the dry rub sticks properly. In a small bowl, mix together the 1 tsp Onion Powder, 1 tsp Paprika, 1 tsp Salt, and 0.5 tsp Black Pepper.
Rub this spice mixture all over the ribs, pressing it into the meat. Place the ribs meat-side up on a foil-lined baking sheet. Brush lightly with 1 tbsp Olive Oil from the 2 tbsp Olive Oil. Cover the tray tightly with foil and bake for 2 hours until the meat starts pulling away from the bones.
Prepare the Sweet and Sour Sauce
While the ribs bake, make the sauce. In a saucepan over medium heat, combine the 1 cup Ketchup, 0.75 cup Brown Sugar, 0.25 cup Apple Cider Vinegar, 0.25 cup Soy Sauce, 0.5 cup Pineapple Juice, minced 4 cloves Garlic Cloves, and grated 1 tbsp Fresh Ginger.
Dice the 1 whole Red Bell Pepper and stir it into the sauce. Bring to a simmer and cook for 5-7 minutes until the red bell pepper softens. This builds deep flavor before thickening.
Thicken the Sauce and Finish the Ribs
In a small bowl, mix the 1 tbsp Cornstarch with 2 tablespoons of water to create a slurry. Gradually whisk this into the simmering sauce. Continue cooking for 3-4 minutes until the sauce thickens enough to coat the back of a spoon.
Remove the ribs from the oven and carefully drain any rendered fat from the baking sheet. Increase oven temperature to 400°F. Brush the ribs generously with half of the thickened sauce, using the remaining 1 tbsp Olive Oil to help it spread evenly.
Glaze and Caramelize
Return the ribs to the oven, uncovered, for 10-12 minutes until the sauce begins to caramelize and turn sticky and glossy. Keep an eye on them to prevent burning—the high sugar content in the brown sugar and ketchup can darken quickly.
Baste the ribs with the remaining sauce and bake for another 5-7 minutes until the glaze is set. The ribs should have a deep mahogany color with a beautiful shine. Remove from oven and let rest for 5 minutes before slicing between the bones to serve.
Pro Tips For Making Sweet And Sour Pork Ribs Oven
- Pre-Cook the Ribs: Parboil the ribs for 10 minutes before baking to render out excess fat and guarantee tender meat—I learned this the hard way after my first batch came out chewy.
- Balance the Sauce: Mix 1 part apple cider vinegar to 2 parts ketchup for the right tang-to-sweet ratio, then adjust brown sugar to taste—sounds simple, but it’s the difference between cloying and perfect.
- Skip the Foil Tent: Resist the urge to cover the ribs with foil while baking; the sauce caramelizes better when exposed to direct heat, giving you that sticky, glossy finish.
- Rest Before Serving: Let the ribs sit 5-10 minutes after baking so the juices redistribute—my grandmother swore by this, and she was right.
Pro Cooking Tips for sweet and sour pork ribs oven
Low and Slow Wins
Start at 325°F for 2 hours—this gentle heat renders fat without drying the meat. I learned this trick from pitmasters in Charleston who swear by patience. Covering with foil traps steam, keeping the ribs moist as they cook. 🌡️
Sauce Simmer Secret
Let your sauce simmer for 5-7 minutes before thickening. This builds depth as the red bell pepper and fresh ginger meld with the other ingredients. I use my vintage cast iron saucepan for even heat distribution.
Thickening Technique
Always mix cornstarch with cold water first to prevent lumps. Add the slurry slowly while whisking—the sauce should coat the back of a spoon. If it thickens too much, stir in 1-2 tbsp of water to adjust consistency.
Glaze Application
Brush sauce on ribs at 400°F for caramelization. Use half first, then add the rest after 10-12 minutes. The high sugar content in brown sugar and ketchup needs watching to prevent burning.
Baste every 5 minutes for even coverage and maximum stickiness.
Rest Before Serving
Let ribs rest for 5 minutes after baking. This allows juices to redistribute throughout the meat. I like to tent them loosely with foil to keep them warm while finishing other dishes. 💡
Nutrition Facts
Frequently Asked Questions
Can I use spare ribs instead of baby back ribs?
Yes, but adjust cooking time. Spare ribs are larger and need 30-45 minutes more at 325°F. Baby backs are more tender, while spares have more flavor and fat.
Why did my sauce turn out too thin?
Your slurry may need more time. Simmer the sauce with cornstarch mixture for 3-4 minutes until it coats a spoon. For thinner sauce, reduce heat and cook longer.
How do I store leftovers?
Keep ribs in an airtight container in the fridge for 3-4 days. Reheat at 350°F for 10-15 minutes to maintain moisture. Sauce may thicken when cold—add water as needed.