
Recipes/Cooking
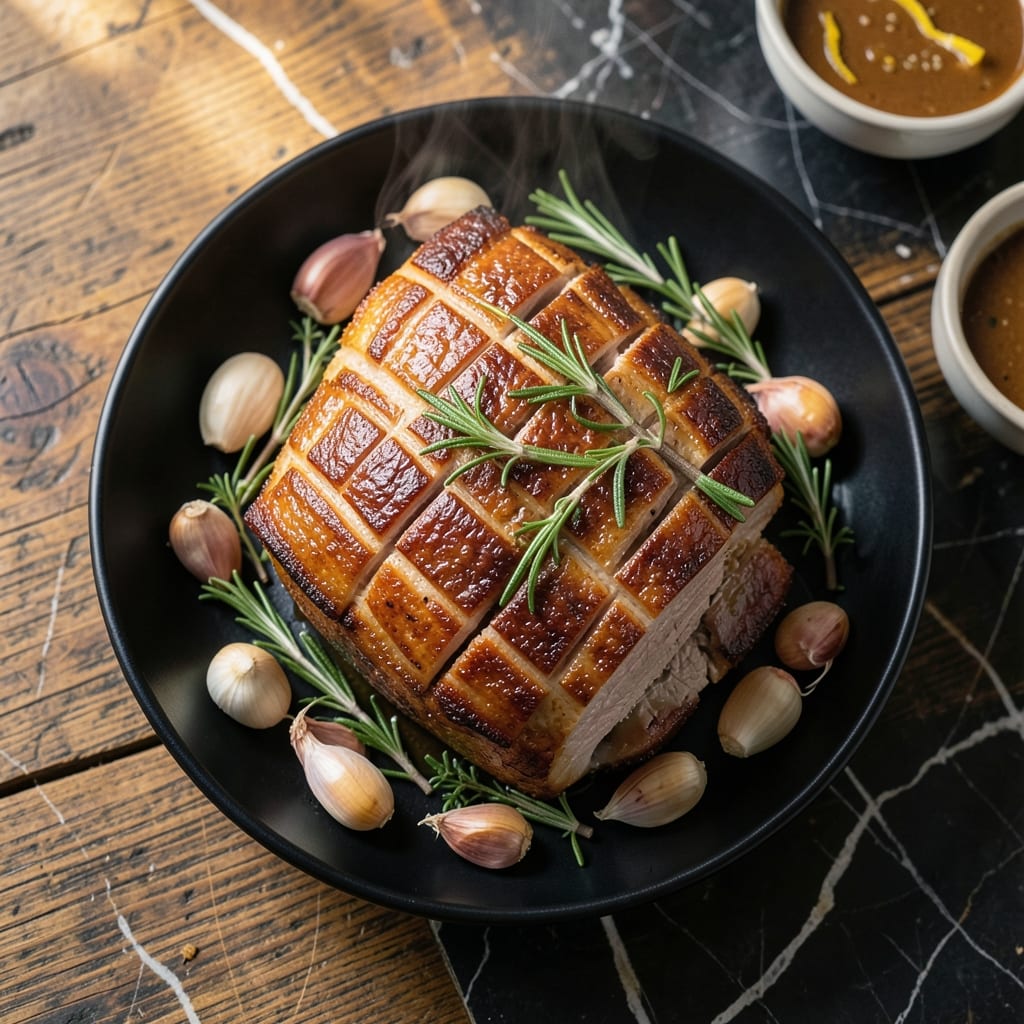
This boneless pork belly roast recipe delivers crispy skin and layers that melt in your mouth. Growing up in Georgia, pork was always the star of family gatherings, and this method brings that tradition to your table.
The secret is scoring the fat cap deeply before roasting, allowing the heat to render the fat while creating maximum surface area for crispiness. I’ve tested this technique countless times at The Smoky Pig, and it never fails to impress.
After a slow roast at high heat, you’ll get a golden, shatteringly crispy exterior with tender, juicy meat underneath. The contrast between the two textures is what makes this dish unforgettable.
Perfect for Sunday supper or a special occasion. Here’s how to nail it every time.
Ingredients for boneless pork belly roast
A handful of bold flavors and one star ingredient. That’s all you need.
| Ingredient | Amount | Notes |
|---|---|---|
| Boneless Pork Belly 🥓 | 2 lb | Skin-on, fat cap intact |
| Kosher Salt 🧂 | 2 tbsp | Diamond Crystal preferred |
| Black Pepper 🌶️ | 1 tsp | Freshly ground for best flavor |
| Garlic Cloves 🧄 | 6 cloves | Smashed, unpeeled |
| Fresh Rosemary Sprigs 🌿 | 4 whole | Woody stems removed |
| Fresh Thyme Sprigs 🍃 | 4 whole | Woody stems removed |
| Dijon Mustard 🟡 | 2 tbsp | Whole grain variety works too |
| Apple Cider Vinegar 🍏 | 1 tbsp | Balances richness of pork |
| Brown Sugar 🍚 | 1 tbsp | Light or dark, packed |
| Olive Oil 🫒 | 1 tbsp | For searing fat cap |
| Chicken Stock 🍲 | ½ cup | Low-sodium preferred |
| Red Pepper Flakes 🌶️ | ½ tsp | Optional for subtle heat |
The pork belly is everything here. Find it at a good butcher shop or Asian market—supermarkets sometimes carry it frozen. Ask for skin-on, boneless, about 1.5-2 inches thick. The fat cap should be even (the good stuff, not the pre-cut scraps). I always grab mine from The Smoky Pig when I’m testing recipes—consistent quality.
No fresh herbs? Dried at one-third the amount works, but fresh really shines. Short on time? Skip the vinegar and sugar—just salt, pepper, and garlic still deliver. The Dijon is non-negotiable though (trust me on this). For the stock, vegetable works if that’s what you’ve got. The rosemary can be swapped for sage if you’re feeling fancy.
Pork belly freezes beautifully for up to 6 months. Thaw overnight in the fridge. Once cooked, leftovers keep 4-5 days refrigerated. Reheat gently to keep the fat crispy (worth the extra minute).
Why You'll Love This Recipe
- Set It and Forget: Honestly, just rub the pork belly with salt, pepper, garlic, and rosemary, then let the oven do the work.
- Crispy, Herby Bite: That crackling skin with the aromatic rosemary and garlic? I’ll be real: it’s the reason I make this every other weekend.
- Feeds My Crew Twice: One roast gives us dinner and next-day sandwiches—my kids fight over the leftovers.
- Budget Luxury: Pork belly feels fancy, but it’s cheaper than steak and just as impressive.
Step-by-step instructions for boneless pork belly roast
Here's my tested method for achieving that perfect crispy fat cap with tender meat underneath.
Score and Season the Pork Belly
Pat the 2 lb Boneless Pork Belly dry with paper towels. Using a sharp knife, score the fat cap in a crosshatch pattern, cutting about ¼ inch deep without piercing the meat. This helps render the fat and creates more surface area for crispiness.
Rub the pork belly all over with 2 tbsp Kosher Salt and 1 tsp Black Pepper. I press the seasoning into the scores and meat to ensure every bite is well-flavored. The salt will also help draw out moisture for a better sear later.
Create the Herb and Garlic Rub
In a small bowl, mix together 2 tbsp Dijon Mustard, 1 tbsp Apple Cider Vinegar, 1 tbsp Brown Sugar, 0.5 tsp Red Pepper Flakes, 1 tbsp Olive Oil, 4 whole Fresh Rosemary Sprigs (finely chopped), and 4 whole Fresh Thyme Sprigs (leaves removed). The mustard acts as a binder for the rub while adding tang.
Spread this mixture evenly over the pork belly, making sure to work it into the scored fat cap. Add the 6 cloves Garlic Cloves (smashed and unpeeled) around the meat—they'll infuse flavor during cooking. Let it marinate at room temperature for 30 minutes while your oven preheats.
Sear the Fat Cap for Maximum Crispiness
Preheat your oven to 400°F. Heat a large oven-safe skillet over medium-high heat. Place the pork belly fat-side down in the dry skillet. You'll hear a satisfying sizzle—that's the fat starting to render.
Sear undisturbed for 8-10 minutes until the fat cap develops a deep golden brown crust. Watch for the edges to start curling slightly and the fat to begin bubbling in the scores. This high-heat sear is crucial for that promised crispy texture.
Roast Low and Slow with Liquid
Flip the pork belly so the fat cap is up. Pour 0.5 cup Chicken Stock into the skillet, being careful not to splash the hot fat. Transfer the skillet to the preheated oven. The liquid will create steam to keep the meat moist while the fat continues to crisp.
Roast for 1 hour 30 minutes to 2 hours, basting the pork belly with the pan juices every 30 minutes. You're looking for the fat cap to turn a rich mahogany color and the meat to be fork-tender. The internal temperature should reach 195-200°F for that melt-in-your-mouth texture.
Rest and Serve
Remove the pork belly from the oven and transfer it to a cutting board, fat cap up. Let it rest for 15-20 minutes before slicing. This allows the juices to redistribute and the fat cap to set slightly, making it easier to slice cleanly.
Cut the pork belly into 1-inch thick slices, serving each portion with a spoonful of the pan juices. The contrast between the crispy fat cap and the tender meat underneath should be perfect. Serve immediately while the fat cap is still at its crispest.
Pro Tips For Making Boneless Pork Belly Roast
- Score the Skin: Cut 1/4-inch crosshatches in the pork belly skin before seasoning—this lets the fat render out and the salt, garlic, and rosemary penetrate deep. I learned this the hard way after my first few roasts came out greasy instead of crisp.
- Dry Overnight: Pat the pork belly dry, then leave it uncovered in the fridge for 12-24 hours. Sounds weird, but it works: the surface dries out just enough for that perfect crackling crust.
- Low and Slow: Start at 450°F for 30 minutes to get the skin blistering, then drop to 300°F for 2-3 hours. After burning three batches, I finally figured out this is the only way to get tender meat without charred edges.
- Rest Before Slicing: Give it a solid 15-20 minutes under foil after roasting—I skip this when I'm lazy, but the juices redistribute and the slices hold together way better.
Flavor customization for this recipe
Sweet and Spicy
Swap the Dijon Mustard for gochujang and increase Brown Sugar to 2 tbsp. This Korean-inspired twist adds sweet heat that pairs beautifully with the pork's richness. I learned this variation from a pitmaster friend in Charleston.
Herb Forward
Replace Rosemary and Thyme with 6 Fresh Sage Leaves and 1 tbsp Fresh Tarragon. These delicate herbs add a sophisticated note perfect for special occasions. The sage especially complements the pork beautifully.
Citrus Zing
Add zest of 1 orange and 2 tbsp fresh orange juice to the rub mixture. The citrus brightens the dish and cuts through the fat. This works particularly well when I'm serving the pork belly with roasted root vegetables. 🌟
Smoky Depth
Incorporate 1 tsp smoked paprika and ½ tsp ground cumin into your dry rub. These warm spices add a subtle smokiness without overpowering. I often use this when cooking on my vintage Grillworks smoker.
Asian Fusion
Create a marinade with 3 tbsp soy sauce, 1 tbsp rice vinegar, 1 tbsp honey, and 1 tsp grated ginger. Let the pork belly marinate overnight for maximum flavor penetration. This version reminds me of my time studying in Asia.
Mediterranean Touch
Add 1 tsp dried oregano and 1 tsp lemon zest to the rub. Serve with a side of tzatziki for dipping. The bright, fresh flavors balance the richness perfectly. 💛
Nutrition facts
Frequently asked questions
Why score the fat cap before cooking?
Scoring helps render the fat while creating more surface area for crispiness. Without scoring, the fat won’t crisp evenly and the seasoning won’t penetrate as well.
Can I use a different cut of pork?
Pork shoulder works but lacks the rich fat layers of belly. For similar texture, try pork ribs with the membrane removed. The cooking time may need adjustment.
How do I prevent the fat cap from getting soggy?
Pat the meat dry before seasoning, and ensure the oven is fully preheated to 400°F. Baste frequently but avoid covering during roasting.
What’s the best way to reheat leftovers?
Place slices on a wire rack in a 350°F oven for 10-15 minutes. This keeps the fat crispy while warming the meat through.