
Main Courses
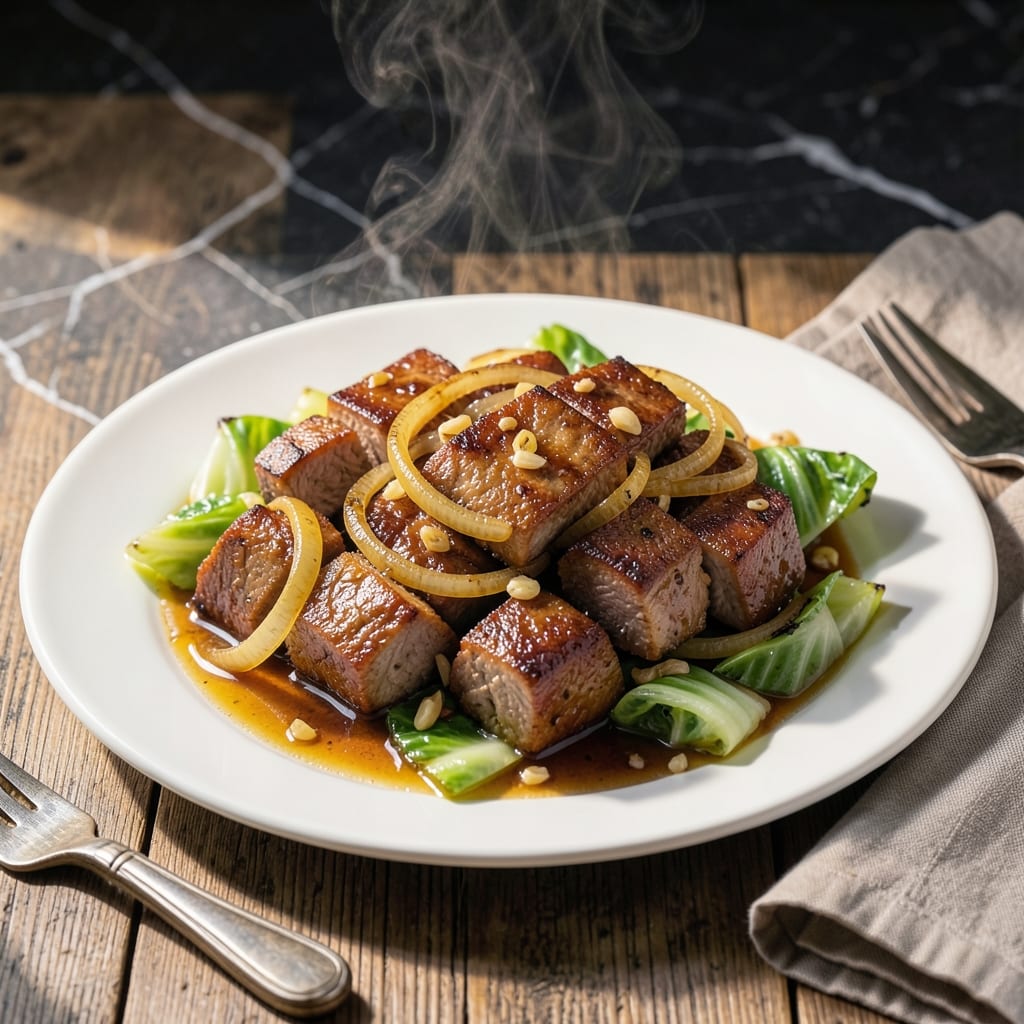
This pork cushion with cabbage pressure cooker recipe delivers tender meat and perfectly cooked vegetables in a fraction of the time. My years in professional kitchens taught me that the pressure cooker is the secret to achieving fall-apart pork without the long braise.
The combination of pork cushion and cabbage creates a classic pairing that’s both hearty and balanced. I use simple ingredients and precise timing to ensure the pork stays juicy while the cabbage softens just enough to soak up the savory flavors.
What you get is a meal that tastes like it simmered all day but comes together in under an hour. The pressure cooker locks in moisture, so the pork stays succulent and the cabbage retains its texture without turning mushy.
This dish is proof that comfort food doesn’t have to be complicated. Set it, forget it, and enjoy a savory feast.
Ingredients for pork cushion with cabbage pressure cooker
Simple ingredients, professional results. Nothing fancy, just smart cooking in the pressure cooker.
| Ingredient | Amount | Notes |
|---|---|---|
| Pork Cushion 🥩 | 2 lb | Boneless, cut into chunks |
| Green Cabbage 🥬 | 1 whole | Medium head, cut into wedges |
| Yellow Onion 🧅 | 1 whole | Large, sliced into strips |
| Garlic Cloves 🧄 | 4 cloves | Minced for depth of flavor |
| Low-Sodium Soy Sauce 💧 | ¼ cup | For umami richness |
| Apple Cider Vinegar 🍏 | 2 tbsp | Balances the richness |
| Brown Sugar 🍚 | 2 tbsp | Light or dark works |
| Dijon Mustard 🟡 | 1 tbsp | Smooth, not whole grain |
| Chicken Broth 🥣 | 1 cup | Low-sodium preferred |
| Olive Oil 🫒 | 2 tbsp | For searing pork |
| Kosher Salt 🧂 | 1 tsp | Adjust to taste |
| Black Pepper 🌶️ | ½ tsp | Freshly ground preferred |
| Bay Leaf 🍃 | 1 whole | Dried, for aroma |
| Thyme Sprigs 🌿 | 3 pieces | Fresh, or 1 tsp dried |
The pork cushion is key here—look for well-marbled pieces at your butcher or Whole Foods meat counter. If they don’t have it pre-cut, ask them to trim and cube a pork shoulder for you (it’s the same cut). Cabbage should feel heavy for its size with crisp outer leaves. I grab mine from the farmers market when it’s in season, but Trader Joe's has solid organic options year-round.
No pork cushion? Pork shoulder cut into chunks works just as well. Swap the soy sauce for coconut aminos if you need gluten-free. Out of apple cider vinegar? White wine vinegar at half the amount does the trick. The Dijon can be yellow mustard in a pinch, but you’ll lose some depth. If you’ve got fresh rosemary, add a sprig or two—it pairs beautifully with the thyme.
This keeps 4-5 days in the fridge and actually tastes better the next day. Freezes for 3 months if you want to make a double batch. Reheat gently on the stove to keep the pork from drying out (the pressure cooker keeps it juicy, but a second round of heat can tighten things up).
Why You'll Love This Recipe
- Set and Forget: I toss everything in the pressure cooker and walk away—no babysitting required.
- Umami Bomb: The soy sauce, garlic, and pork create this rich, savory depth that’s honestly hard to beat.
- Feeds a Hungry Crowd: Between us, this stretches further than I expect—perfect for family dinners or leftovers that actually taste better the next day.
Step-by-step instructions for pork cushion with cabbage
This pressure cooker method locks in flavor while keeping the pork incredibly tender.
Sear the Pork Cushion
Set your pressure cooker to Sauté mode and add the 2 tbsp olive oil. When the oil shimmers, add the 2 lb Pork Cushion chunks in a single layer. Don't overcrowd the pot—work in batches if needed. Sear undisturbed for 3-4 minutes per side until deeply browned.
You'll know it's ready to flip when the pork releases easily from the bottom. This sear builds a flavor foundation that makes all the difference. Sprinkle the pork with the 1 tsp kosher salt and 0.5 tsp black pepper as it browns.
Build the Flavor Base
After removing the pork, add the sliced 1 whole Yellow Onion to the pot. Sauté for 2-3 minutes until softened and just starting to brown. Then add the minced 4 cloves Garlic Cloves and cook for 30 seconds until fragrant.
Pour in the 0.25 cup Low-Sodium Soy Sauce, 2 tbsp Apple Cider Vinegar, 2 tbsp Brown Sugar, and 1 tbsp Dijon Mustard. Stir well to combine, scraping up any browned bits from the bottom. This creates a rich, tangy sauce that will infuse the pork and cabbage.
Pressure Cook the Pork and Cabbage
Return the pork to the pot along with any accumulated juices. Add the 1 cup Chicken Broth, 1 whole Bay Leaf, and 3 pieces Thyme Sprigs. Stir to combine, then add the 1 whole Green Cabbage wedges, pressing them down into the liquid.
Secure the lid and set the pressure cooker to High Pressure for 25 minutes. Once the cooking time is complete, let the pressure release naturally for 10 minutes, then quick-release any remaining pressure. The pork should be fall-apart tender, and the cabbage should be soft with a slight bite.
Finish and Serve
Remove the lid and discard the bay leaf and thyme sprigs. Taste the sauce and adjust seasoning if needed—I often find it perfect as is.
Let the mixture sit for 5 minutes to allow the flavors to meld together. The cabbage will soak up some of that delicious sauce, making every bite rich and satisfying. Serve hot, with extra sauce spooned over the top for maximum flavor in every mouthful.
Pro Tips For Making Pork Cushion With Cabbage Pressure Cooker
- Brown the Pork First: Sear the pork cushion in batches on high heat until deeply browned—about 3-4 minutes per side. I learned this the hard way: skipping this step leaves the meat pale and the sauce flavorless.
- Slice Cabbage Thick: Cut the green cabbage into 1-inch wedges so it holds up under pressure. Thin slices turn to mush, and nobody wants mushy cabbage in their stew.
- Deglaze the Pot: After browning the pork and onions, pour in a splash of water or broth and scrape up those browned bits. Sounds weird, but it works: that’s where all the flavor hides.
- Don’t Overfill: Fill the pressure cooker no more than two-thirds full to avoid clogging the vent. After one too many messy cleanups, I finally started measuring.
Make-ahead tips for leftovers
Prep Ahead
You can chop the pork cushion, cabbage, and onion the night before and store them in separate airtight containers in the fridge. This saves 15-20 minutes on cooking day. I often do this after dinner to streamline the next day's meal prep.
Pre-Sear Option
For even more time savings, sear the pork the night before and store it with the sauce in the fridge. The next day, just add the cabbage wedges and chicken broth, then pressure cook as directed. The flavors deepen overnight—trust me, it’s worth it. 💡
Double Batch
This recipe scales beautifully. Double the ingredients and cook for the same 25 minutes under pressure. The extra portions freeze well for up to 3 months. I always make a double batch—leftovers are just as delicious reheated.
Reheating Tips
To reheat, thaw overnight in the fridge, then warm gently on the stove over medium-low heat with a splash of chicken broth. Avoid microwaving, as it can make the pork tough. Stir occasionally to keep everything moist. ❄️
Sauce Adjustments
If the sauce thickens too much during storage, stir in 2-3 tbsp water or broth while reheating. Taste and adjust seasoning with a pinch of salt or apple cider vinegar if needed. The flavors will taste even better the second time around.
Nutrition facts
Frequently asked questions
What if my pressure cooker doesn't have a sauté function?
Use a skillet to sear the meat first, then transfer everything to the cooker. This keeps the flavor base intact. The 3-4 minutes per side sear is essential for depth of flavor.
Can I use red cabbage instead of green?
Red cabbage adds vibrant color and a slightly sweeter taste. The cooking time remains the same, but the dish will look stunning.
Why did my cabbage turn mushy?
Overcooking or too much liquid can cause this. Stick to the 25 minutes pressure time and 1 cup broth. Quick-release after 10 minutes for best texture.
How do I know when the pork is done?
It should reach 195-200°F internally for fall-apart tenderness. The pressure cooker guarantees this if you follow the timing. No thermometer? Just check that it shreds easily with a fork.